Connect SAS cables to the Lenovo Storage V7000 Gen1 expansion enclosures.
This task applies if you are installing one or more expansion enclosures.
Be aware of the following guidelines
when you attach the cables to the SAS ports. Figure 3 shows
the internal cabling connections between the control enclosure and
the expansion enclosures.
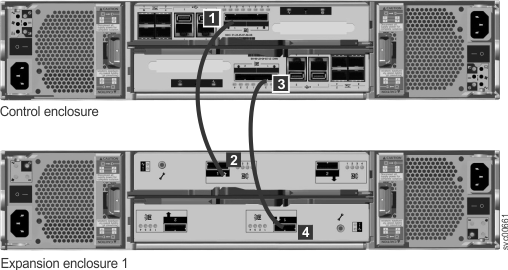
- Attach the SAS cables from the control enclosure
to the first expansion enclosure as shown in Figure 1.
Remove the protective end covers, if necessary. The first expansion
enclosure is below the control enclosure.
Figure 1. Attaching an expansion enclosure to the control enclosure
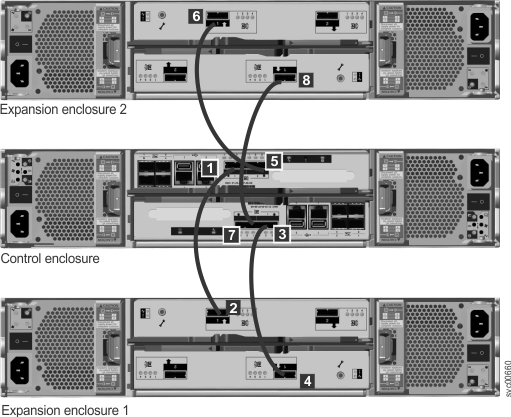
- Attach the SAS cables from the control enclosure
to the second expansion enclosure as shown in Figure 2.
The second expansion enclosure is above the control enclosure.
Figure 2. Adding a second expansion enclosure
- Attach the SAS cables from the first expansion
enclosure to the third expansion enclosure. See Figure 3.
Figure 3. Attaching SAS cables to the enclosures
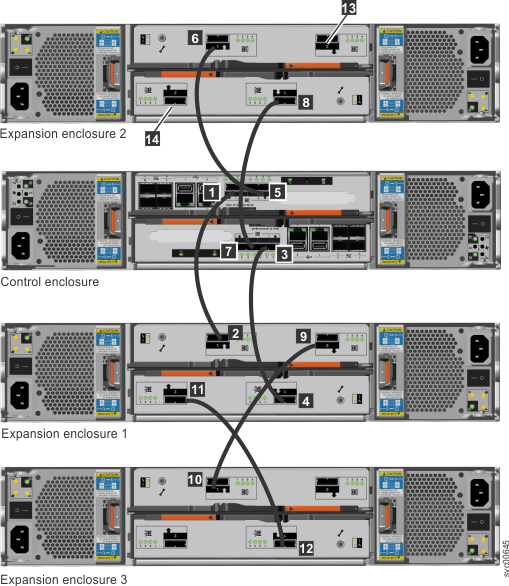
- Port 2 9 of the upper canister, expansion enclosure 1, attaches to Port 1 10 of the upper canister, expansion enclosure 3.
- Port 2 11 of the lower canister, expansion enclosure 1, attaches to Port 1 12 of the lower canister, expansion enclosure 3.