Use this information to replace the rear two hard-disk-drive kit on the system board.
Note:
- Refer to the following rules before you install the rear two hard-disk-drive
kit.
- 2.5-inch hot-swap hard disk drive model
- Supports one 2.5-inch rear two hard-disk-drive kit
- 3.5-inch hot-swap hard disk drive model
- Supports one 2.5-inch rear two hard-disk-drive kit, or
- Supports two 2.5-inch rear two hard-disk-drive kits, or
- Supports one 2.5-inch rear two hard-disk-drive kit and one 3.5-inch rear two hard-disk-drive kit
- 2.5-inch hot-swap hard disk drive model
- Refer to the following rules for the rear two hard-disk-drive
kit numbering.
- 2.5-inch hot-swap hard disk drive model
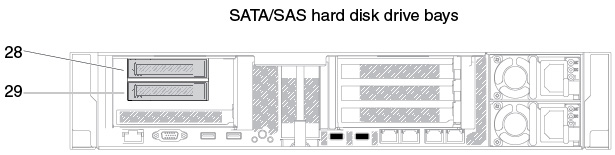
- 2.5-inch rear two hard-disk-drive kit numberingFigure 1. 2.5-inch rear two hard-disk-drive kit numbering
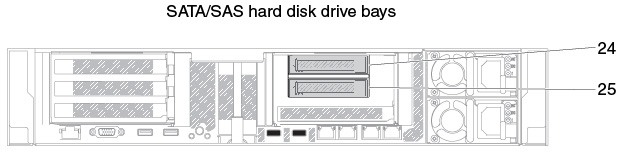
- 2.5-inch rear two hard-disk-drive kit numberingFigure 2. 2.5-inch rear two hard-disk-drive kit numbering
- 2.5-inch rear two hard-disk-drive kit numbering
- 3.5-inch hot-swap hard disk drive model
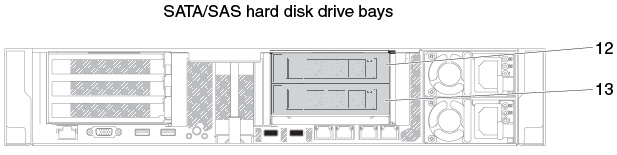
- 3.5-inch rear two hard-disk-drive kit numberingFigure 3. 3.5-inch rear two hard-disk-drive kit numbering
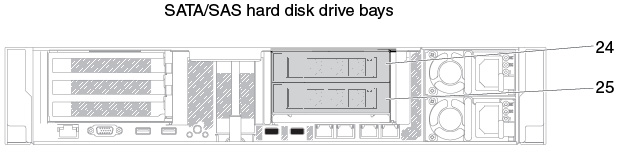
- 3.5-inch rear two hard-disk-drive kit numbering with RAID cardFigure 4. 3.5-inch rear two hard-disk-drive kit numbering with RAID card
- 3.5-inch rear two hard-disk-drive kit numbering
- 2.5-inch hot-swap hard disk drive model
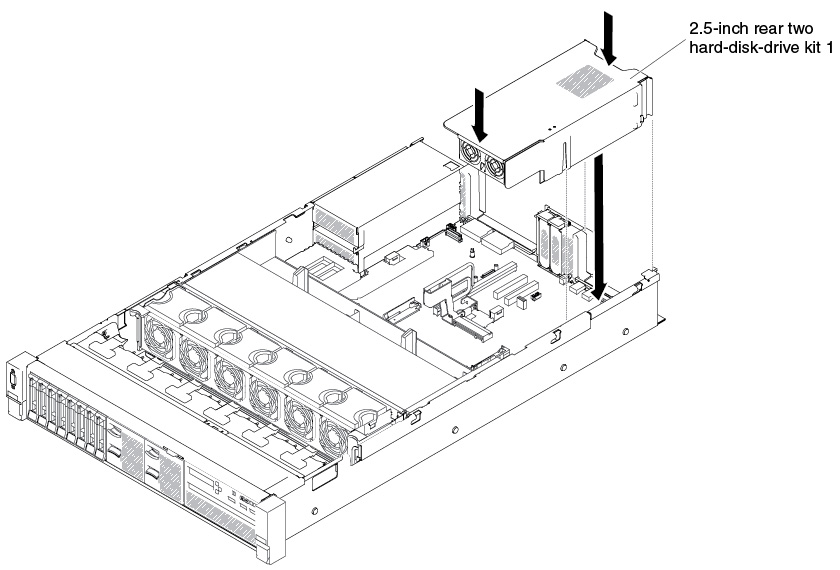
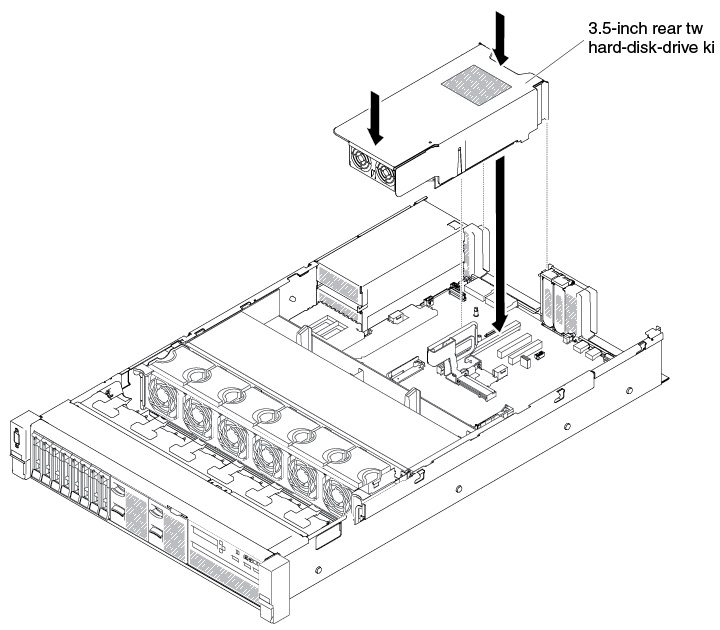
To install the rear two hard-disk-drive kit, complete the following steps:
- Align the rear two hard-disk-drive kit with the connector
on the system board and align it with the slots on the chassis; then,
lower it into the server and press down firmly until the rear two
hard-disk-drive kit is seated correctly in the connector on the system
board
- 2.5-inch rear two hard-disk-drive kit installationFigure 5. 2.5-inch rear two hard-disk-drive kit installation
- 3.5-inch rear two hard-disk-drive kit installationFigure 6. 3.5-inch rear two hard-disk-drive kit installation
- 2.5-inch rear two hard-disk-drive kit installation
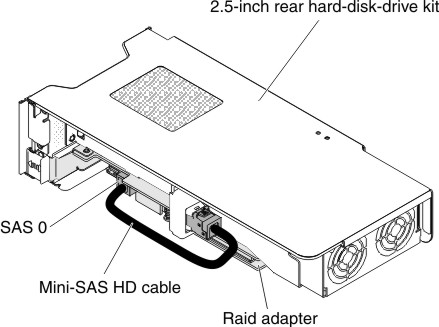
- Connect the Mini-SAS HD cable from the rear hard drive
backplane to the RAID card.
- For 2.5-inch rear two hard-disk-drive kitFigure 7. 2.5-inch rear two hard-disk-drive kit cable routing
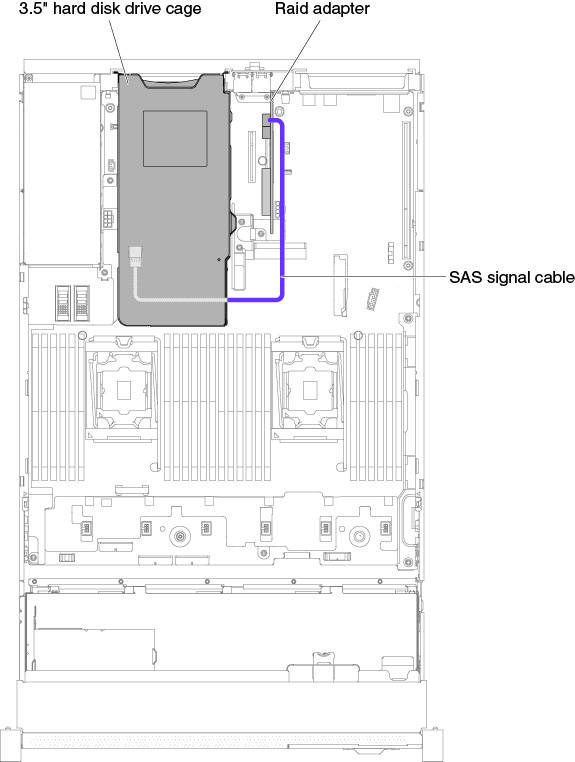
- For 3.5-inch rear two hard-disk-drive kit, there are two possible
cable routing configurations:
- Connect to the RAID card on the slot 4 from the rear hard drive
backplane.Figure 8. 3.5-inch rear two hard-disk-drive kit cable routing
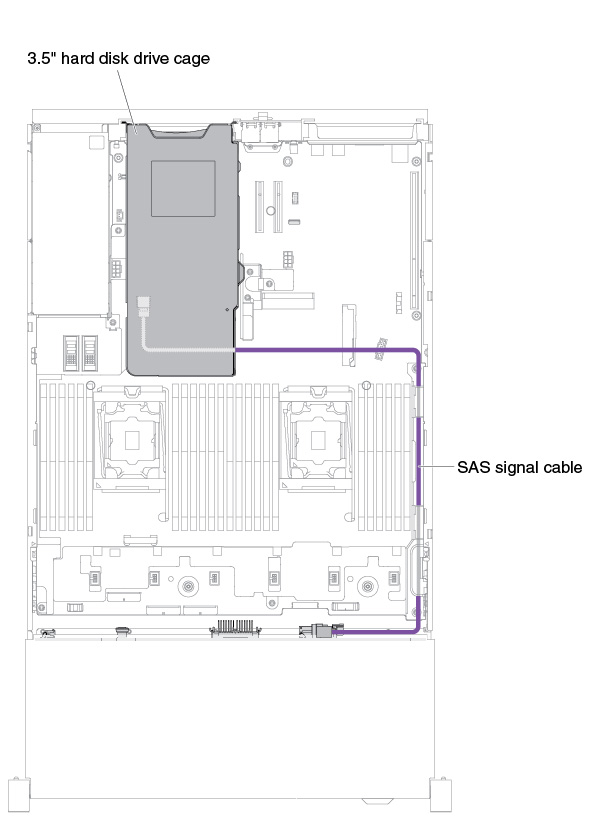
- Connect to the 3.5-inch HDD hot-swap backplane with 12 HDDs from
the rear hard drive backplaneFigure 9. 3.5-inch rear two hard-disk-drive kit cable routing
- Connect to the RAID card on the slot 4 from the rear hard drive
backplane.
- For 2.5-inch rear two hard-disk-drive kit