Installing Fibre Channel or 10 Gbps iSCSI/FCoE ports

You can add Fibre Channel ports or 10 Gbps iSCSI/FCoE ports to a Lenovo Storage V7000 Gen2 control enclosure by installing host interface adapters.

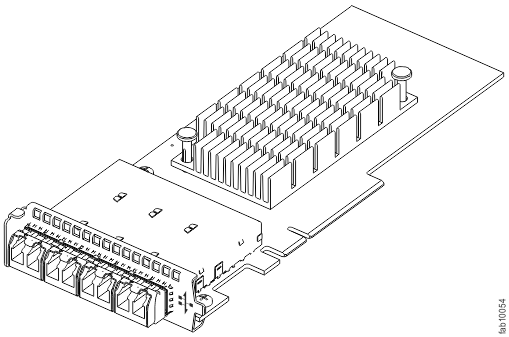
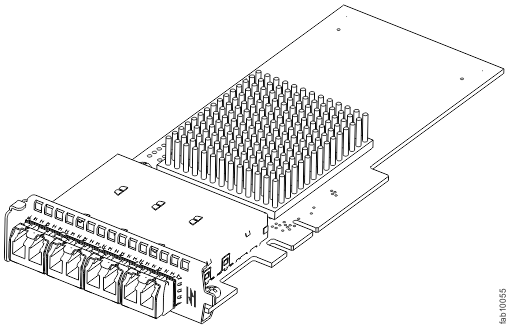
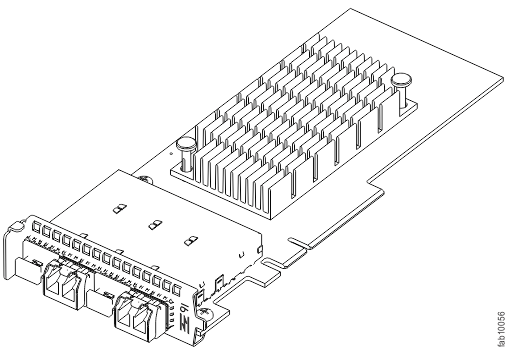
Each node canister of a Lenovo Storage V7000 Gen2 control enclosure has two host interface adapter slots, labeled slot 2 and slot 3. The slots can be used to add Fibre Channel or iSCSI/FCoE interface ports to the enclosure. Figure 1, Figure 2, and Figure 3 show the available host interface adapter types.

Figure 1. 10 Gbps iSCSI/FCoE host interface adapter
10 Gbps iSCSI/FCoE interface adapter

Figure 2. 8 Gbps Fibre Channel host interface adapter
8 Gbps Fibre Channel interface adapter

Figure 3. 16 Gbps Fibre Channel host interface adapter
16 Gbps Fibre Channel interface adapter

The same adapter combination must be installed in both node canisters in a control enclosure.

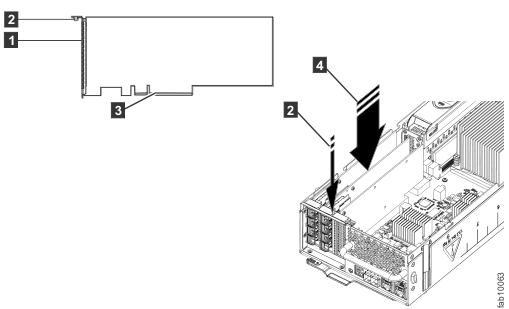
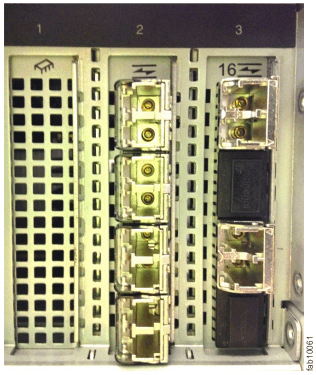
Figure 4 shows a node canister with a 16 Gbps Fibre Channel adapter fitted in PCIe slot 3.

Figure 4. 16 Gbps Fibre Channel host interface adapter installed in slot 3
16 Gbps Fibre Channel interface adapter installed in slot 3

If you are installing multiple options in a node canister that is already open on the bench, refer to steps 4 to 12 to add one or two host interface adapters to the node canister. Otherwise, this procedure installs one or two host interface adapters in both node canisters of a control enclosure. When the hardware is installed and each node canister is back online, the SAN needs to be configured to use the new ports.

If you are installing a new adapter and also want to install new memory at the same time, see Installing extra memory and compression accelerator options in Lenovo Storage V7000 Gen2 node canisters for instructions.

To install a new adapter, complete the following steps:

  1. Locate node canister 1, which is the node canister on the left of the enclosure when viewed from the rear.
  2. Complete Procedure: Removing a Lenovo Storage V7000 Gen2 node canisterand return here.
  3. Remove the lid of the canister, as described in Procedure: Removing and replacing the lid of a Lenovo Storage V7000 Gen2 node canisterand return here.
  4. Identify which host interface adapters are to be installed and which slot accommodates each adapter. Ensure that you have two identical sets of host interface adapters and small form-factor pluggable (SFP) transceivers for those adapters so that node canister 2 is configured with the same host interface adapters as node canister 1.
  5. Remove the replacement host interface adapter1 from its package.
    Figure 5 illustrates the installation process.
  6. Remove any SFP transceiver from each port of the host interface adapterby following the removal steps of Replacing an SFP transceiver in a Lenovo Storage V7000 2076-524 control enclosure and put the SFP transceiver safely to one side.
  7. Place the connecting edge 3 of the new host interface adapter on the host interface adapter connector so that the connectors are aligned and the ports on the rear of the host interface adapter are aligned in the slot at the rear of the canister.
  8. Ensure that the adapter is perpendicular to the canister main board so that the small tab 2 on the top of the bracket is aligned with the alignment hole in the top edge of the slot.
  9. Maintain alignment while applying pressure to the top edge of the host interface adapter4 opposite the connecting edge, to push the host interface adapter into the connector (Figure 5).
    Figure 5. Installing the host interface adapter
    Installing the host interface adapter

  10. Check that the host interface adapter is installed squarely in its slot. If the small tab 2 of the mounting bracket is not positioned correctly, pull the adapter out of the slot slightly and repeat steps 7 onwards to install the adapter correctly.
  11. Install any required SFP transceivers in the ports of the host interface adapter by following the installation steps of Replacing an SFP transceiver in a Lenovo Storage V7000 2076-524 control enclosure.
  12. Repeat steps 5 to 11 to install another host interface adapter, if required.
  13. Replace the canister lid, as described in Procedure: Removing and replacing the lid of a Lenovo Storage V7000 Gen2 node canister.
  14. Reinstall the node canister into the enclosure from which it was removed in step 2. If the enclosure is powered, the node canister starts.
  15. Connect the cables to the canister, including additional cables for the installed ports.
  16. Log in to the service assistant of the upgraded node canister. Click the Ports tab of the Node Details table. Use the WWPN information to configure your SAN, as described in Configuration details.
  17. When the canister is back online, check the event log for new events and run the fix procedure for any errors displayed.
    Notes:
    • An event with error code 1199 indicates that a valid hardware change needs to be confirmed. Use the management GUI to run the fix procedure for the event.
    • An event with error code 1470 indicates that the two canisters in the enclosure do not have the same hardware configuration. The event is fixed when the second node canister is also upgraded.
  18. Repeat steps 2 to 17 on node canister 2, the node canister on the right of the enclosure when viewed from the rear.
  19. When the node canister is back online, use the management GUI to check the event log and run the fix procedures for any errors displayed.