Removing an optical drive

Use this information to remove an optical drive.

You can go to Front view to see the locations of an optical drive on the server.
Note: The optical drive is available only on some models.

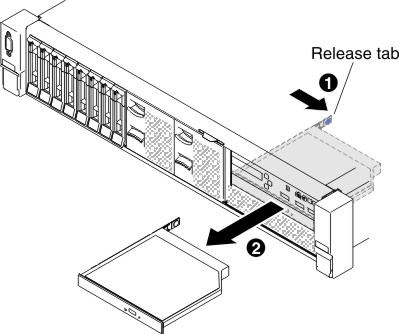
To remove an optical drive, complete the following steps:

  1. Read the safety information that begins on Safety and Installation guidelines.
  2. Turn off the server and peripheral devices and disconnect all power cords.
  3. Remove the server top cover (see Removing the top cover).
  4. 1 Press and hold the release tab to the right as you 2 push the drive from the rear to slide it out of the bay.
    Figure 1. Optical drive removal
    Optical drive removal
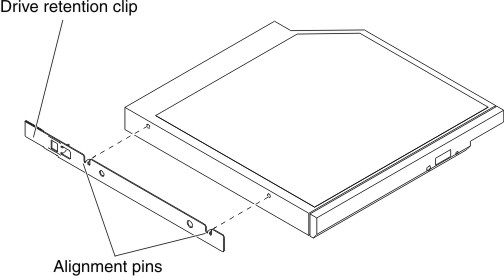
  5. Slide the drive retention clip from the side of the drive. Save the clip to use when you install the replacement drive or replace the optical drive filler panel.
    Figure 2. Optical drive retention clip removal
    Optical drive retention clip removal
  6. Attach the drive retention clip to the side of the optical drive filler panel that you removed in 4.
  7. Slide the optical drive filler panel into the optical drive bay until the optical drive filler panel clicks into place.
  8. If you are instructed to return the optical drive, follow all packaging instructions, and use any packaging materials for shipping that are supplied to you.