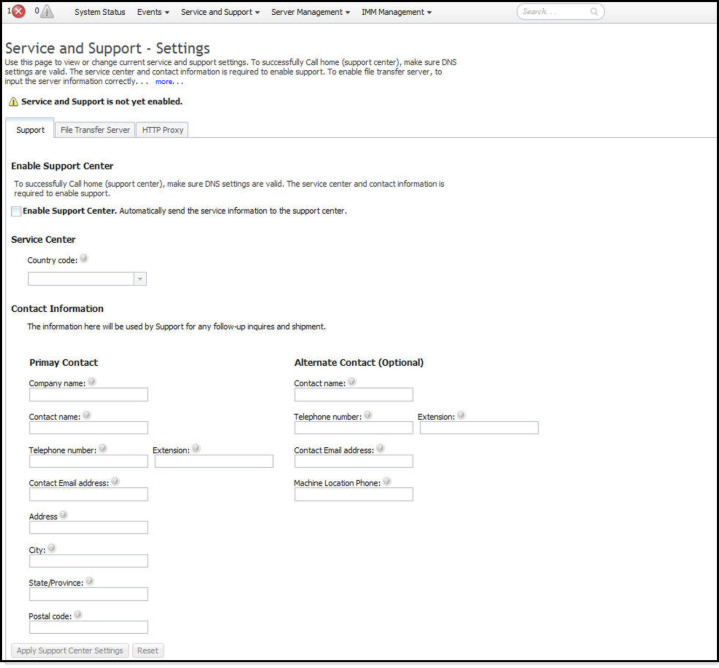
Settings option
To view, add, or change the service and support settings use the information in this topic.
Use the Settings option under the Service and Support tab to view, add, or change the service and support settings (as shown in the following illustration).
Note
- To successfully call home (call Support), make sure the Domain Name System (DNS) settings are valid.
- The service center and contact information are required to access Support.
- To enable the file transfer server, the server information must be completed correctly.
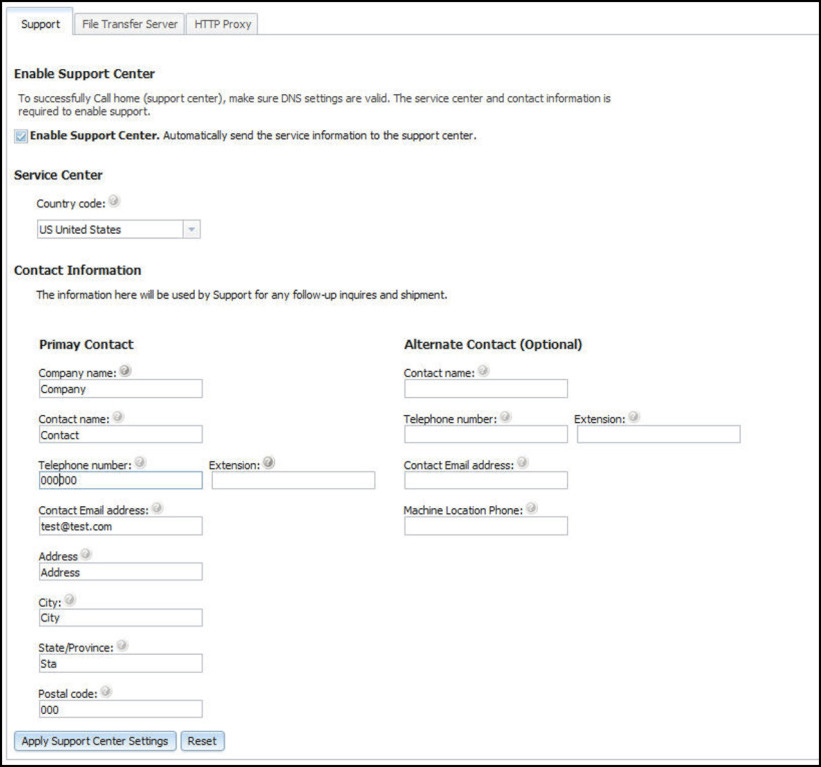
To allow the service processor to automatically send service information, complete the following steps (as shown in the following illustration):
- Click the Support tab.
- Click the Enable Support Center checkbox.
- From the Service Center list, select your Service Center location.
- Enter your Primary Contact information in the following fields:
- Company name
- Contact name
- Telephone number
- Extension (if applicable)
- Contact Email address
- Address
- City
- State/Providence
- Postal code
- Click the Apply Support Center Settings button.
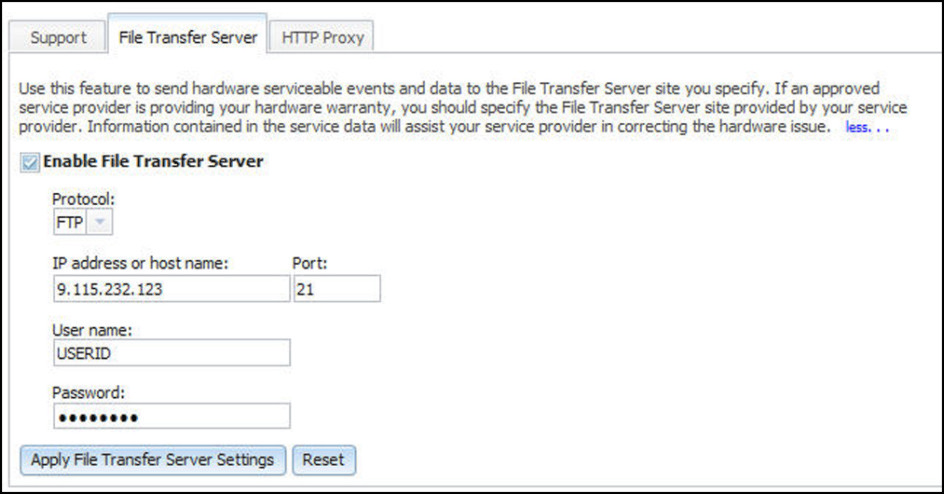
To allow the service processor to send hardware serviceable events and data to the specified File Transfer Server site, complete the following steps (as shown in the following illustration):
- Click the File Transfer Server tab.
- Check the Enable File Transfer Server checkbox.
- Click the Apply File Transfer Server Settings button.
To establish the method used to connect to the internet, complete the following steps (as shown in the following illustration):
- Click the HTTP Proxy tab.
- Click one of the following methods to access the internet:
- The management server can access the Internet without a proxy server
- The management server will require a proxy server to access the Internet
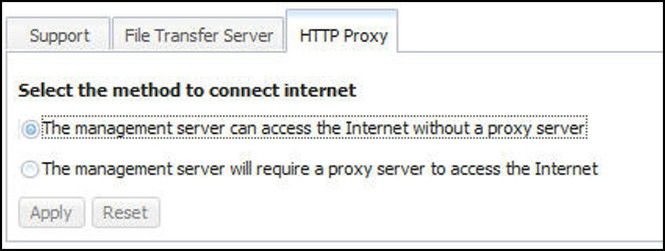
- If a proxy server is required to access the internet, complete the following steps (as shown in the following illustration); otherwise, continue to step 4.
- In the IP address or host name field type the IP address or host name for the proxy server.
- In the Port field enter the port for the proxy server.
NoteTheUse authentication checkbox is an optional selection. 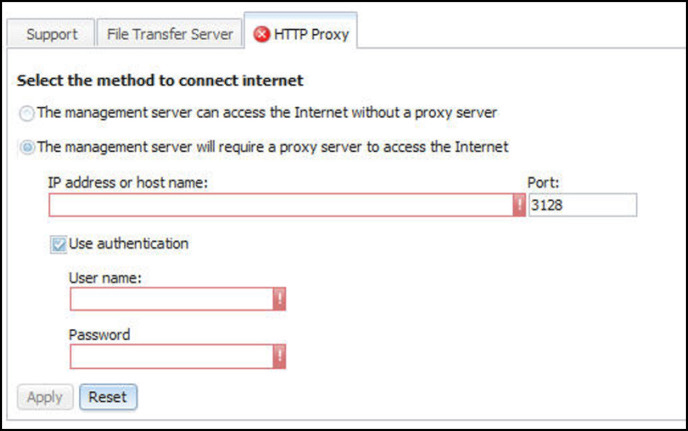
Give feedback