Configuring SNMP alert settings
Use the information in this topic to configure SNMP agents.
Complete the following steps to configure the IMM2 SNMP setting.
Click the SNMP tab (as shown in the following illustration).
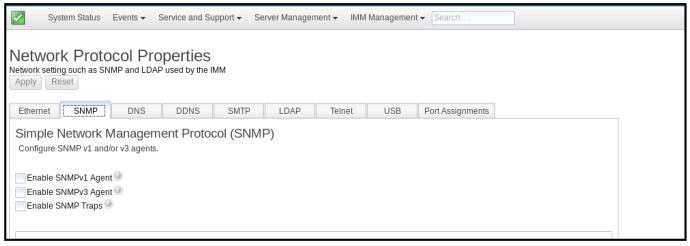
- Check the corresponding checkbox to enable the SNMPv1 agent, the SNMPv3 agent or SNMP Traps.
- If enabling the SNMPv1 agent, proceed to step 4. If enabling the SNMPv3 agent, proceed to step 5. If enabling the SNMP Traps, proceed to step 6.
- If enabling the SNMPv1 agent, complete the following fields:
- Click the Contact tab. In the Contact person field, enter the name of the contact person. In the Location field, enter the site (geographical coordinates).
- Click the Communities tab to set up a community to define the administrative relationship between SNMP agents and SNMP managers. You must define at least one community.Note
- If an error message window appears, make the necessary adjustments to the fields that are listed in the error window; then, scroll to the top of the page and click Apply to save your corrected information.
- You must configure at least one community to enable this SNMP agent.
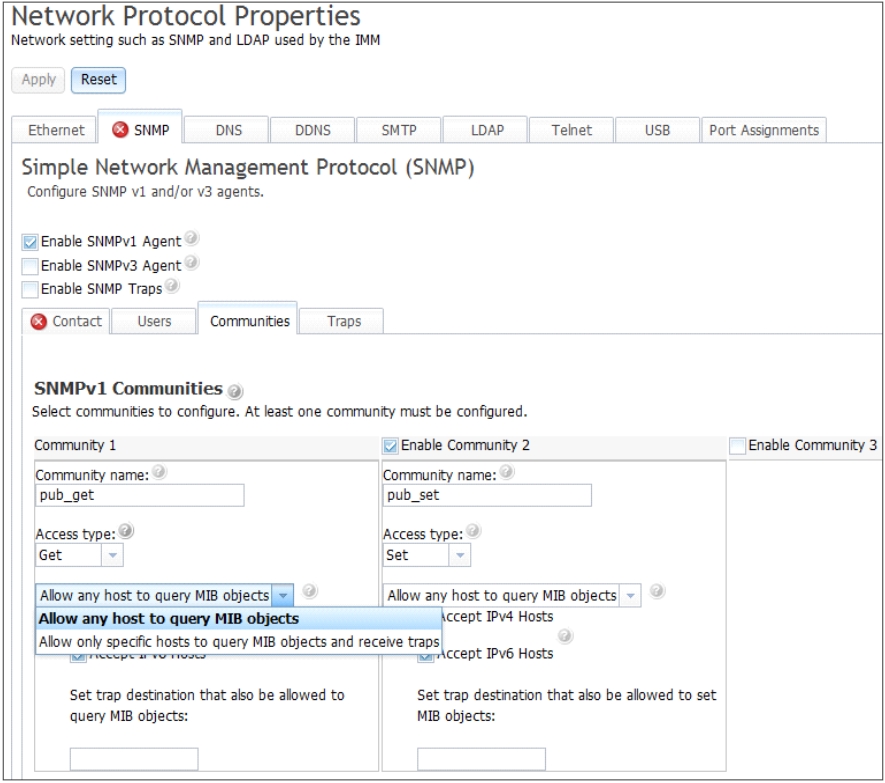
Complete the following fields:- In the Community Name field, enter a name or authentication string to specify the community.
- In the Access type field, select an access type.
- Select Trap to allow all hosts in the community to receive traps.
- Select Get to allow all hosts in the community to receive traps and query management information base (MIB) objects.
- Select Set to allow all hosts in the community to receive traps, query, and set MIB objects.
- In the Host Name or IP Address field, enter the host name or IP address of each community manager.
- Click Apply to apply the changes you have made.
- If enabling the SNMPv3 agent, complete the following fields:
- Click the Contact tab. In the Contact person field, enter the name of the contact person. In the Location field, enter the site (geographical coordinates).
- Click the Users tab to show the list of local user accounts for the console.NoteThis is the same list that is in the Users option. You must configure SNMPv3 for each user account that will need SNMPv3 access.
- Click Apply to apply the changes you have made.
- If enabling the SNMP Traps, configure the events alerted in the Traps tab.
Note
When configuring SNMP, required fields that are not complete or have incorrect values are highlighted with a red X. This red X can be used to guide you through completion of the required fields.
The following illustration shows the SNMP tab when configuring the SNMPv1 agent.
Give feedback