Removing the rear 2.5-inch hot-swap-drive kit
Use this information to remove the rear 2.5-inch hot-swap-drive kit.
To remove the rear 2.5-inch hot-swap-drive kit, complete the following steps:
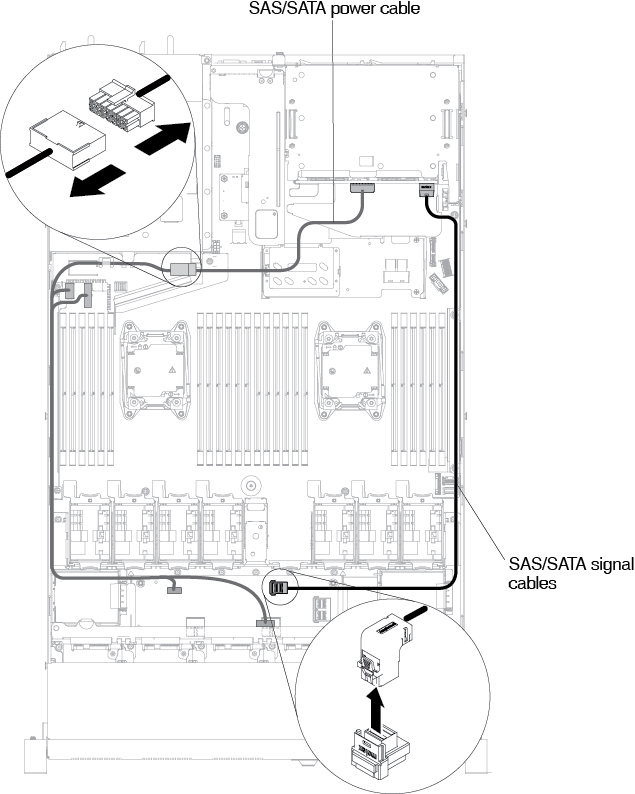
- Disconnect the Mini-SAS HD (12Gb) and power cables from the 2.5-inch hot-swap-drive backplane and power connector.Figure 1. Mini-SAS HD (12Gb) and power cable disconnection
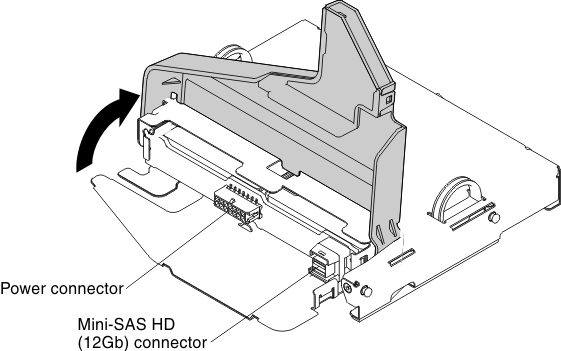
- Lift the air duct and disconnect the Mini-SAS HD (12Gb) and power cables from the rear hot-swap backplane.Figure 2. Mini-SAS HD (12Gb) and power cable connector location on backplane
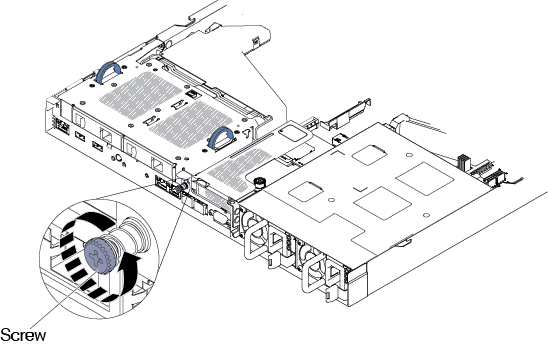
- Loosen the screw located at the rear of the chassis.Figure 3. Screw location
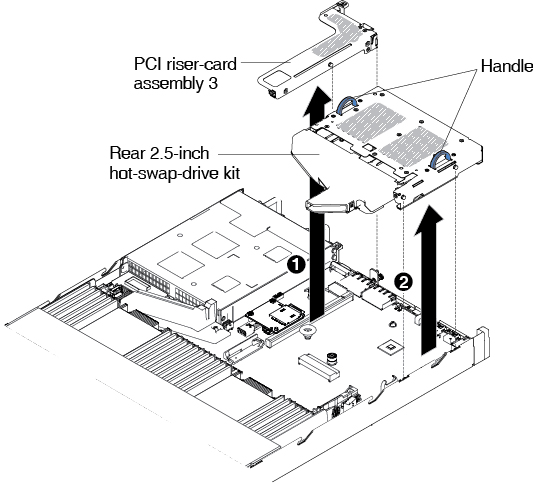
- Remove PCI riser-card assembly 3 first if it is installed on the system board (see Removing a PCI riser-card assembly). Afterwards, grasp the two handles located on the sides of the rear 2.5-inch hot-swap-drive kit, and slowly lift it out of the chassis.AttentionAlways follow the installation sequence in this step. Failure to do so, may result in damage to the rear 2.5-inch hot-swap-drive kit.Figure 4. Rear 2.5-inch hot-swap-drive kit removal
Give feedback