Use this information to remove the DVD cable.
To remove the DVD cable, complete the following steps:
- Read the safety information that begins on Safety and Installation guidelines.
- Turn off the server and peripheral devices and disconnect the power cords.
- Remove the cover (see Removing the cover).
- Remove the fans in fan connectors 2, 3, and 4 (see Removing a hot-swap fan assembly).
- Remove the DVD drive (see Removing an optional DVD drive).
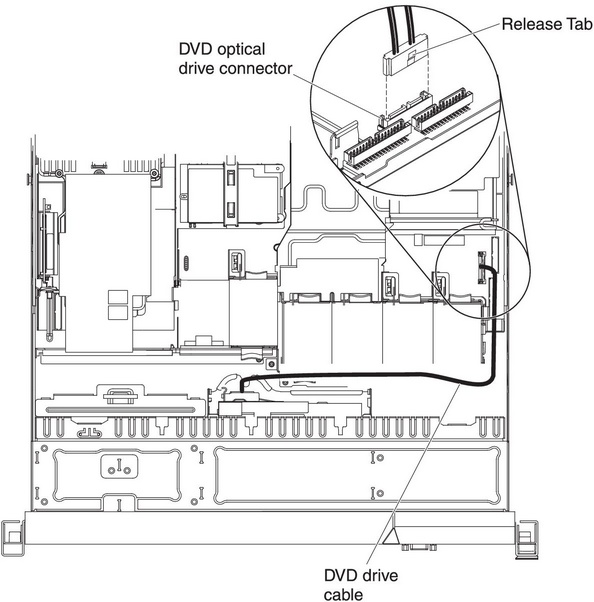
- Press and hold the connector release tab; then, remove the DVD cable from the connector on the system board.
You must press the connector release tab in order to disconnect the DVD cable from the system board. Do not disconnect the DVD cable by using excessive force. Failing to disconnect the DVD cable from the system board properly may damage the connector on the system board. Any damage to the connector may require replacing the system board.
Figure 1. DVD cable connection
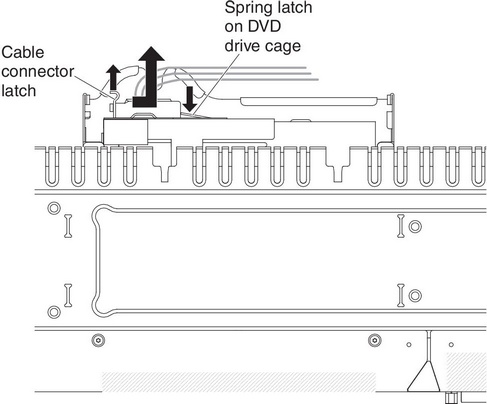
- From the front of the server, grasp the cable connector latch and slide it up toward the fan bracket; then, press the spring latch (right of the cable connector) and slide the cable connector to the right.
Figure 2. DVD cable removal
- Remove the cable from the optical drive cage connector and set it aside.
If you are instructed to return the DVD drive cable, follow all packaging instructions, and use any packaging materials for shipping that are supplied to you.

