Installing a ServeRAID SAS/SATA controller on the SAS/SATA RAID riser card
Use this information to install a ServeRAID SAS/SATA controller on the SAS/SATA RAID riser card.
To install a SAS/SATA adapter on the SAS/SATA RAID riser card, complete the following steps:
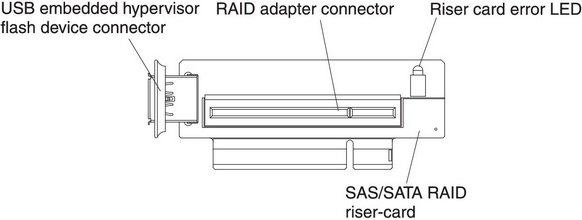
- Align the SAS/SATA adapter so that the keys align correctly with the connector on the SAS/SATA RAID riser-card assembly.Figure 1. RAID adapter connector
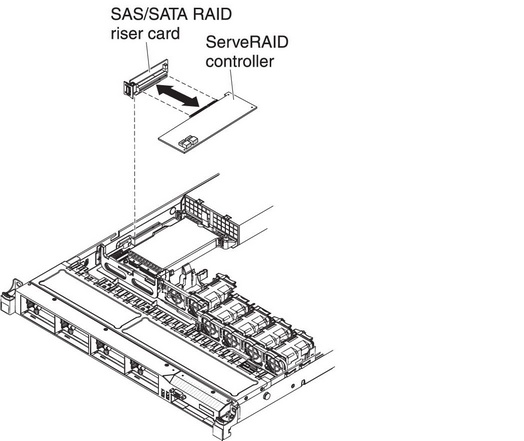
- Insert the SAS/SATA adapter into the connector on the SAS/SATA RAID riser card until it is firmly seated.AttentionIncomplete insertion might cause damage to the server or the adapter.Figure 2. ServeRAID controller installation
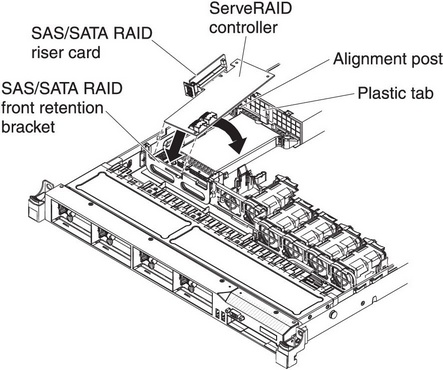
- Align the SAS RAID riser-card assembly keys correctly with the connector on the system board and press down on the assembly until it is seated firmly into the connector on the system board.Figure 3. ServeRAID controller installation
- Connect the signal cables to the SAS/SATA adapter:
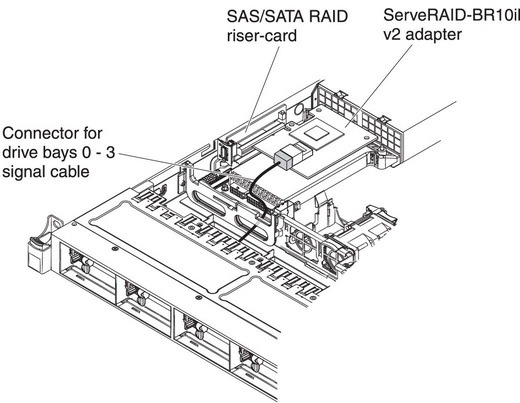
- ServeRAID-BR10il v2 adapter: Take the signal cable that is attached to the drive backplane for drive bays 0 through 3 and connect it to the SAS/SATA connector on the ServeRAID adapter.Figure 4. ServeRAID-BR10il v2 adapter cable connection
- ServeRAID-BR10i, ServeRAID-M1015, ServeRAID-M5014, or ServeRAID-M5015 adpater: Take the signal cable that is attached to the drive backplane for drive bays 4 through 7 and connect it to the ServeRAID adapter connector that is closest to the power supply cage. Connect the other signal cable so that is attached to the drive backplane for drive bays 0 through 3 and connect it to the other connector on the adapter.Figure 5. ServeRAID-BR10i adapter cable connection
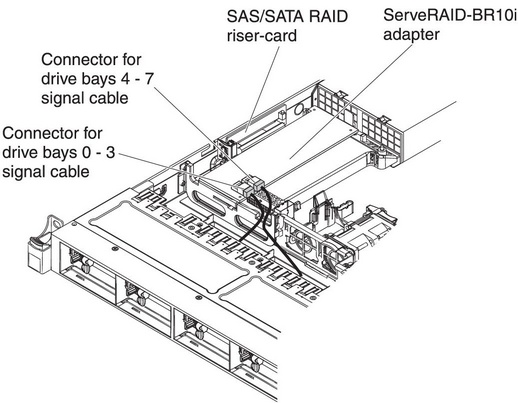 Figure 6. ServeRAID-M5015 adapter cable connection
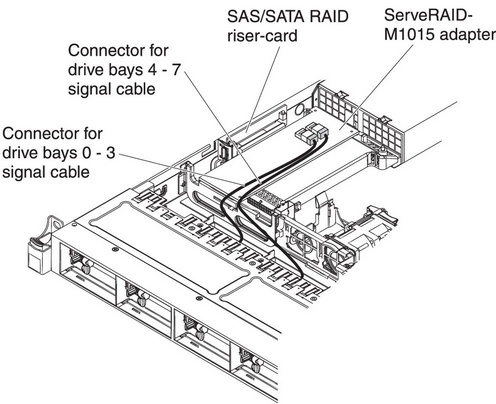
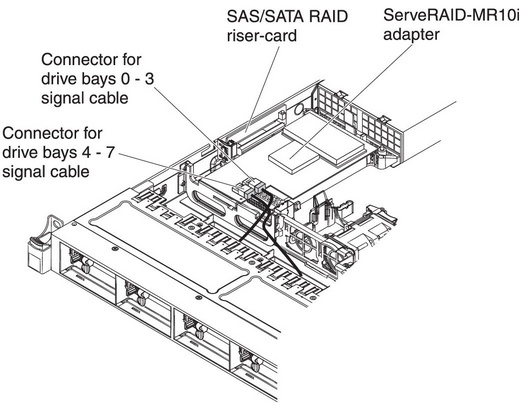
- ServeRAID-M10i adapter: Take the signal cable that is attached to the drive backplane for drive bays 0 through 3 and connect it to the connector on the ServeRAID adapter connector that is closest to the power-supply cage. Connect the other signal cable so that is attached to the drive backplane for drive bays 4 and 7 and connect it to the other connector on the adapter.Figure 7. ServeRAID-M10i adapter cable connection
- ServeRAID-BR10il v2 adapter: Take the signal cable that is attached to the drive backplane for drive bays 0 through 3 and connect it to the SAS/SATA connector on the ServeRAID adapter.
If you have other devices to install or remove, do so now. Otherwise, go to Completing the installation.
Give feedback