Installing a RAID adapter battery remotely in the server
Use this information to install a RAID adapter battery remotely in the server.
The batteries must be installed only on top of the microprocessor 2 air baffle. To install a RAID adapter battery in the server, complete the following steps:
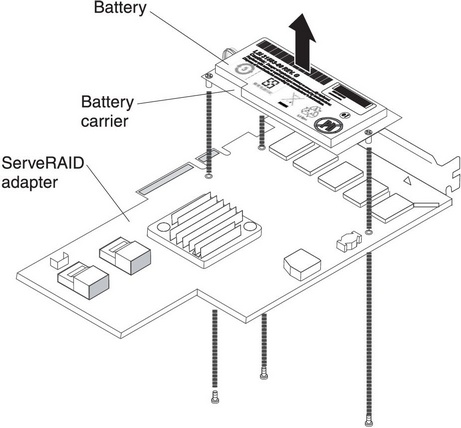
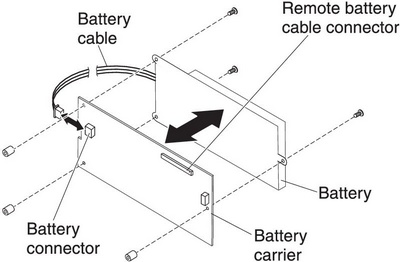
- If a battery and battery carrier are attached to the RAID adapter, disconnect the battery carrier cable from the battery and remove the three screws that secure the battery carrier to the adapter. Set the battery and battery carrier aside.NoteIf your battery and battery carrier are attached with a clip, squeeze the clip on the side of the battery carrier to remove the battery from the battery carrier.Figure 1. Battery removal
- Install the interposer card in the interposer card connector on the RAID adapter:
- Rotate the plastic standoff on the interposer card so that it aligns with the hole on the RAID adapter; then, align the connector on interposer card with the interposer card connector on the RAID adapter.Figure 2. Interposer card installation
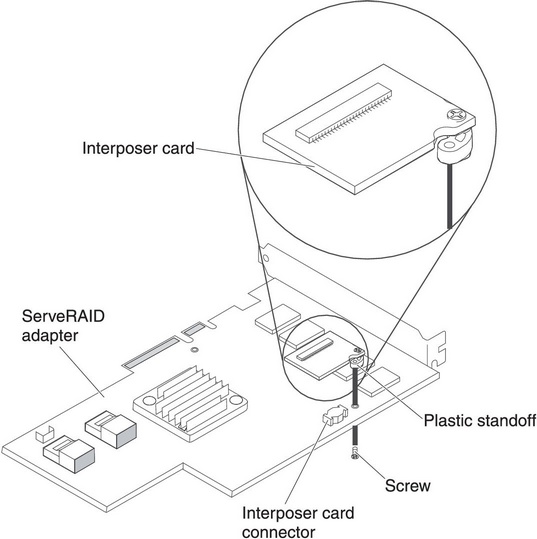
- Rotate the plastic standoff on the interposer card so that it aligns with the hole on the RAID adapter; then, align the connector on interposer card with the interposer card connector on the RAID adapter.
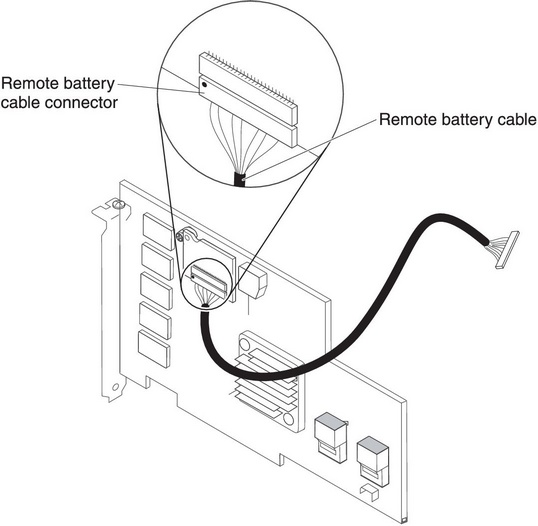
- Connect one end of the remote batter cable to the interposer card.AttentionTo avoid damage to the hardware, make sure that the black dot on the remote battery cable connector faces away from the interposer card on the adapter. Do not force the remote battery cable into the connector.Figure 3. Cable connection
- Route the remote battery cable as shown in the illustration, depending on the PCI slot in which the RAID adapter is installed.Figure 4. Cable connection
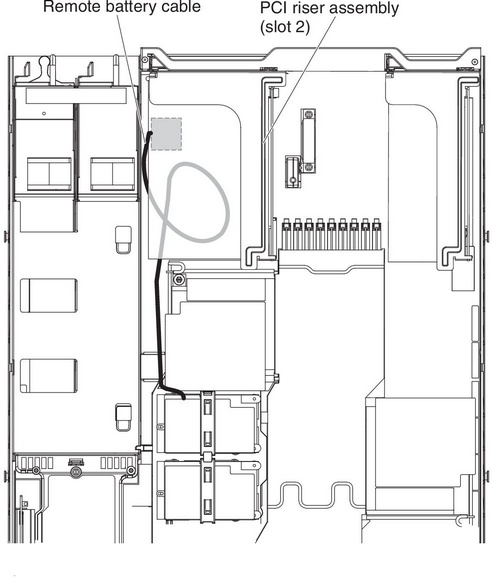 Figure 5. Cable connection
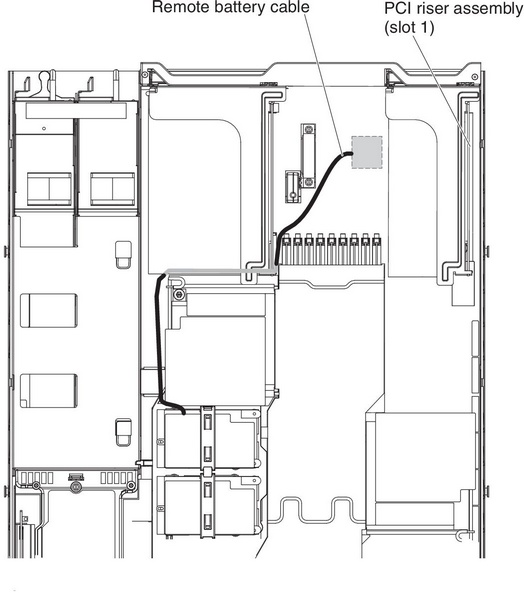
- Connect the other end of the remote battery cable to the remote battery cable connector on the battery carrier.AttentionTo avoid damage to the hardware, make sure that the black dot on the remote battery cable connector faces away from the interposer card on the adapter. Do not force the remote battery cable into the connector.Figure 6. Cable connection
- Install the battery on the microprocessor 2 air baffle:
- Place the battery carrier in the battery mounting slot on the microprocessor 2 air baffle and ensure that battery carrier posts align with the rings on the battery mounting slot so that the battery carrier is secure in the slot.NoteThe positioning of the remote battery depends on the type of remote battery that you install. The long edge of the battery might fit the recessed rings either parallel or perpendicular to the front bezel.Figure 7. Battery installation
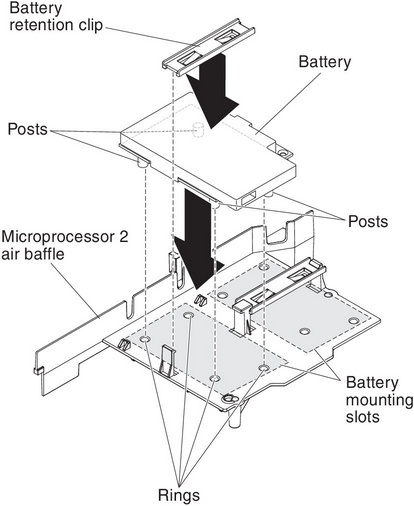
- Place the battery carrier in the battery mounting slot on the microprocessor 2 air baffle and ensure that battery carrier posts align with the rings on the battery mounting slot so that the battery carrier is secure in the slot.
If you have other devices to install or remove, do so now. Otherwise, go to Completing the installation.
Give feedback