
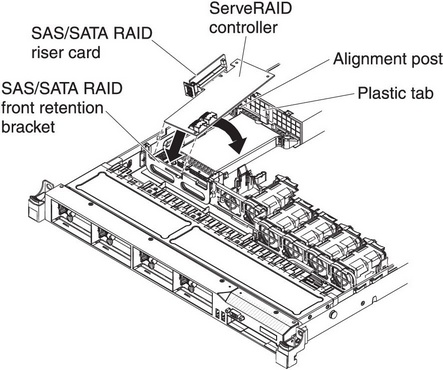
Installing the SAS/SATA RAID riser-card assembly

Use this information to install the SAS/SATA RAID riser-card assembly.

To install the SAS/SATA RAID riser-card assembly, complete the following steps:

  1. Read the safety information that begins on Safety and Installation guidelines.
  2. Turn off the server and peripheral devices and disconnect all power cords.
  3. Remove the cover (see Removing the cover).
  4. Reinstall the SAS/SATA adapter, if one was removed (see Installing a ServeRAID SAS/SATA controller on the SAS/SATA RAID riser card).
  5. Reinstall the USB flash device, if it was removed (see Installing a USB embedded hypervisor flash device).
  6. Align the SAS/SATA RAID riser-card assembly keys correctly with the connector on the system board and press down on the assembly until it is seated firmly into the connector on the system board.
    Figure 1. SAS/SATA RAID riser-card assembly installation
    SAS/SATA RAID riser-card assembly installation
  7. Connect the signal cables to the SAS/SATA adapter (see Step 9 in “Installing a ServeRAID SAS/SATA controller on the SAS/SATA RAID riser card”).
  8. Install the cover (see Installing the cover).
  9. Slide the server into the rack.
  10. Reconnect the power cord and any cables that you removed.
  11. Turn on the peripheral devices and the server.