Replacing the hot-swap drive backplane
Use this information to replace the hot-swap drive backplane.
To install the replacement hot-swap hard disk drive backplane, complete the following steps:
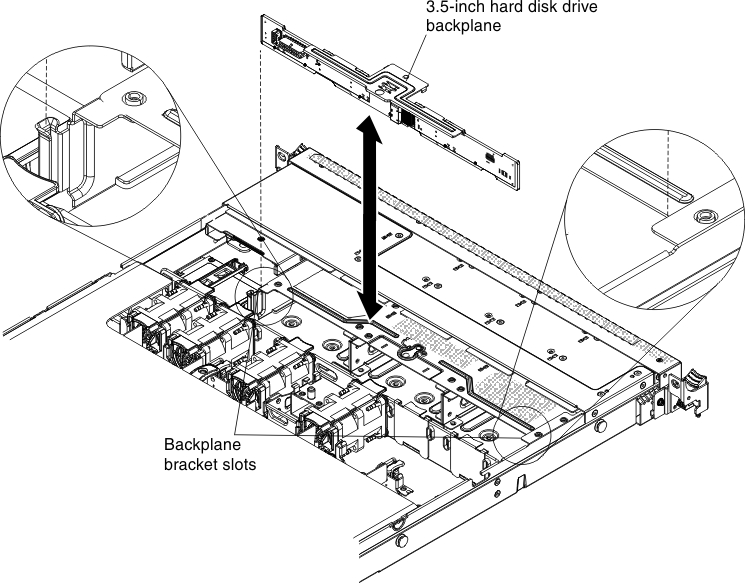
- Install the hard disk drive backplane.NoteYou can reconnect the cables to the hard disk drive backplane before installing the backplane onto the brackets or you can connect the cables after you install the backplane, if that is easier for you.If you would like to install the 3.5-inch drive backplane.
- Insert the hard disk drive backplane into the slots on the backplane bracket and push the hard disk drive backplane down until the backplane is fully seated. Figure 1. Backplane installation
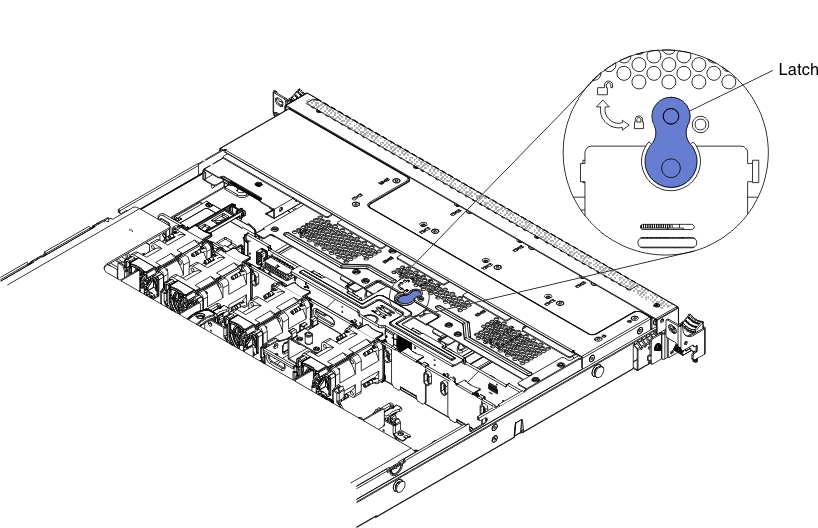
- Adjust the latch to the locked position.Figure 2. Latch adjustment
If you would like to install the 2.5-inch drive backplane.- Insert the hard disk drive backplane into the slots on the backplane bracket and push the hard disk drive backplane down until the backplane is fully seated. Figure 3. Backplane installation
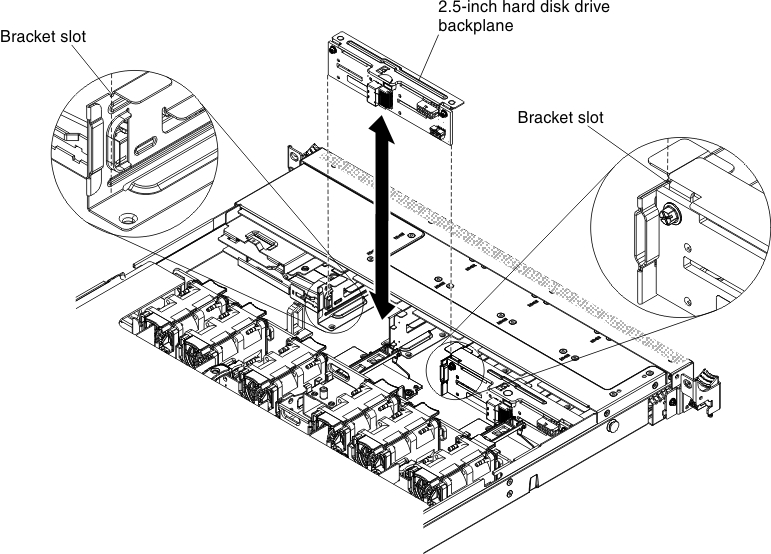
- Insert the hard disk drive backplane into the slots on the backplane bracket and push the hard disk drive backplane down until the backplane is fully seated.
Give feedback