Replacing the front video connector
Use this information to replace the front video connector.
To replace the front video connector board, complete the following steps:
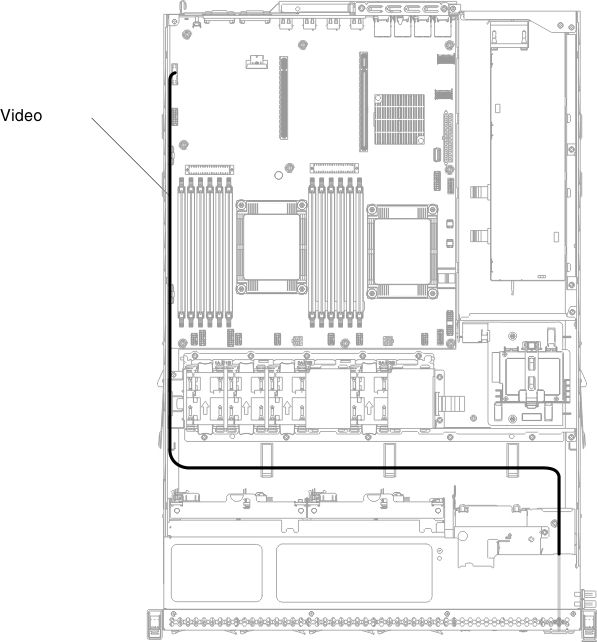
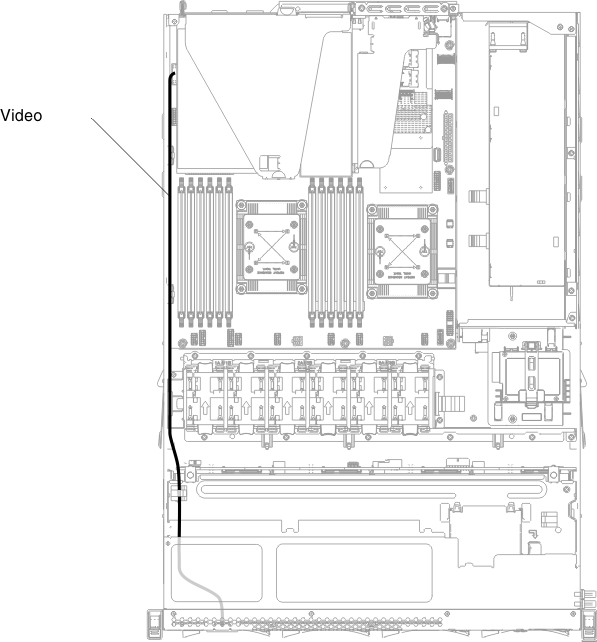
- Align the video connector with the slot on the server and install the two screws to secure it to the server.NoteRefer to the illustrations below for 2.5-inch and 3.5-inch hard disk drive bays models respectively. Depending on your server model, align the video connector from inside or outside the server.Figure 1. Video connector alignment
Give feedback