
Removing the power interposer card assembly

Use this information to remove the power interposer card assembly.

To remove the power interposer card assembly, complete the following steps:

  1. Read the safety information that begins in Safety and Installation guidelines.
  2. Turn off the server (see Turning off the server) and all attached peripheral devices. Disconnect all power cords; then, disconnect all external cables as necessary to replace the device.
  3. Remove the server cover (see Removing the server top cover).
  4. Remove the air baffle (see Removing the air baffle).
  5. If a ServeRAID adapter is installed in PCI riser-card assembly 2, remove PCI riser-card assembly 2 (see Removing a PCI riser-card assembly).
  6. Remove the redundant power supply slightly out of the server to disconnect it from the power interposer card.
  7. Disconnect all power cables from the connectors on the system board. Disengage the power cables from any cable clips.
  8. If a RAID adapter battery is installed on the safety cover, disconnect the power cable from the ServeRAID adapter.
  9. Loosen the screws and remove the safety cover from the top of the power interposer card.
  10. Remove the screws that secure the power interposer card to the chassis.
  11. Disconnect the power cable from the power interposer card; then, remove the power interposer card out of the server.
    Figure 1. Power interposer card assembly removal
    Power interposer card assembly removal
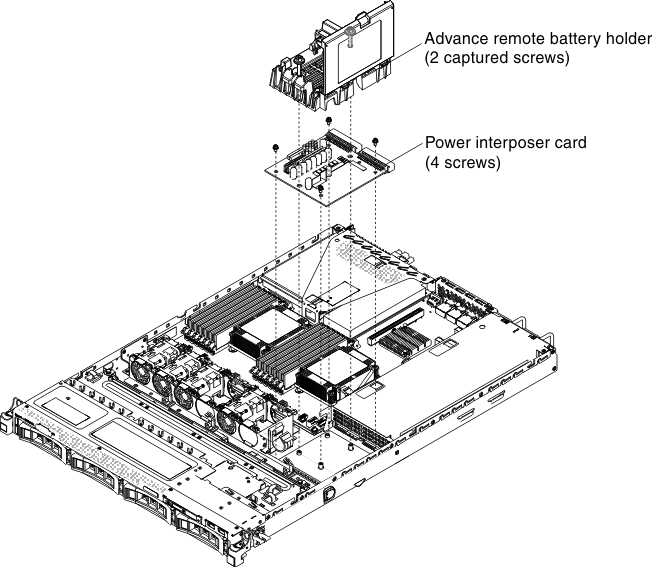
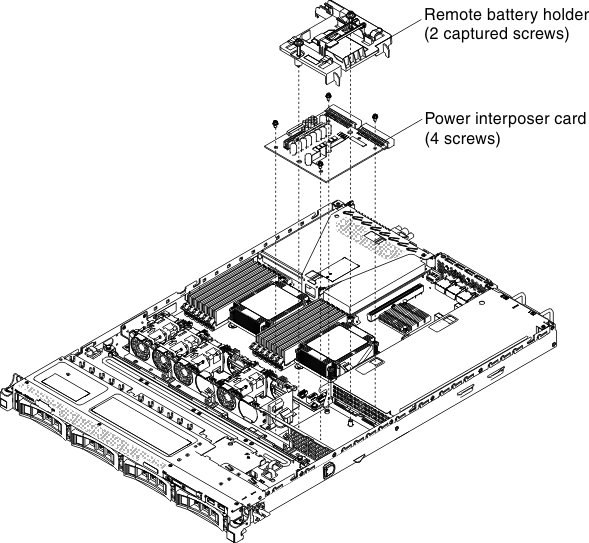
    Figure 2. Power interposer card assembly removal (with advanced remote battery holder)
    Power interposer card assembly removal (with advanced remote battery holder)
  12. If you are instructed to return the power interposer card, follow all of the packaging instructions, and use any packaging materials for shipping that are supplied to you.