Replacing the simple-swap SATA drive backplate assembly
Use this information to replace the simple-swap drive SATA drive backplate assembly.
To install the replacement simple-swap SATA drive and backplate assembly, complete the following steps:
Note
The simple-swap SATA drive and backplate assembly must be installed in the backplane slot closest to the information panel and the SATA drive must be installed in the drive-bay closest to the information panel. The backplate assembly cable connects to the CD/DVD-ROM drive connector on the system board.
- Read the safety information that begins in Safety and Installation guidelines.
- Align the tabs on the bottom of the drive backplate with the backplate slots on the bottom of the backplane cage.Figure 1. Simple-swap SATA drive backplate assembly installation
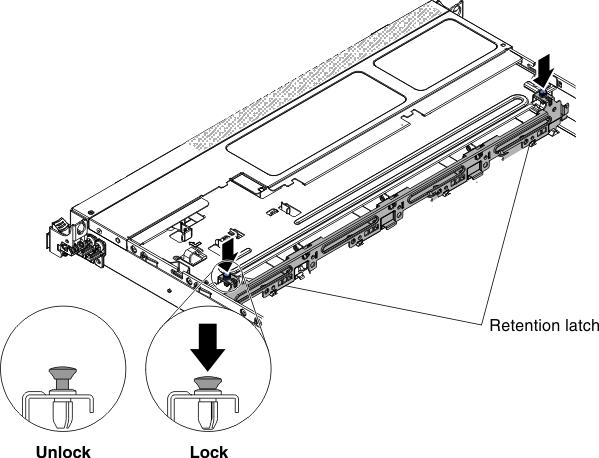
- Insert the drive backplate tabs into the slots on the bottom of the backplate cage and push down the retention latch on top of the drive cage; then, rotate the drive backplate assembly forward until the backplate is latched.
- Reinstall the drive and filler panel and plastic drive-bay spacer.
- Install the cover (see Replacing the server top cover).
- Reconnect the power cords and any cables that you removed.
- Turn on the peripheral devices and the server.
Give feedback