Using the embedded hypervisor
The VMware ESXi embedded hypervisor software is available on the optional IBM USB flash device with embedded hypervisor.
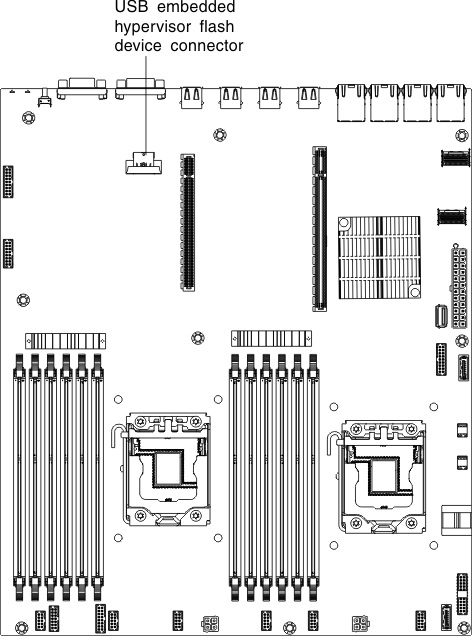
The USB flash device can be installed in the USB connector near PCI riser slot 1 on the system board. Hypervisor is virtualization software that enables multiple operating systems to run on a host system at the same time. The USB flash device is required to activate the hypervisor functions.
To start using the embedded hypervisor functions, you must add the USB flash device to the startup sequence in the Setup utility.
To add the USB flash device to the startup sequence, complete the following steps:
If the embedded hypervisor flash device image becomes corrupt, you can use the VMware Recovery CD that comes with the system to recover the flash device image. To recover the flash device image, complete the following steps:
- Turn on the server.NoteApproximately 1 to 3 minutes after the server is connected to ac power, the power-control button becomes active.
- Insert the VMware Recovery CD into the CD or DVD drive.
- Follow the instructions on the screen.
For additional information and instructions, see the VMware ESXi Server 31 Embedded Setup Guide a the IBM x86 solutions for VMware vSphere Hypervisor website