Removing a CD/DVD drive
Use this information to remove a CD/DVD drive.
To remove a CD/DVD drive, complete the following steps:
- Read the safety information that begins in Safety and Installation guidelines.
- Turn off the server (see Turning off the server) and all attached peripheral devices. Disconnect all power cords; then, disconnect all external cables from the server.
- Remove the server top cover (see Removing the server top cover).
- Remove the PCI riser-card assembly (see Removing a PCI riser-card assembly).
- Remove the air baffle (see Removing the air baffle).
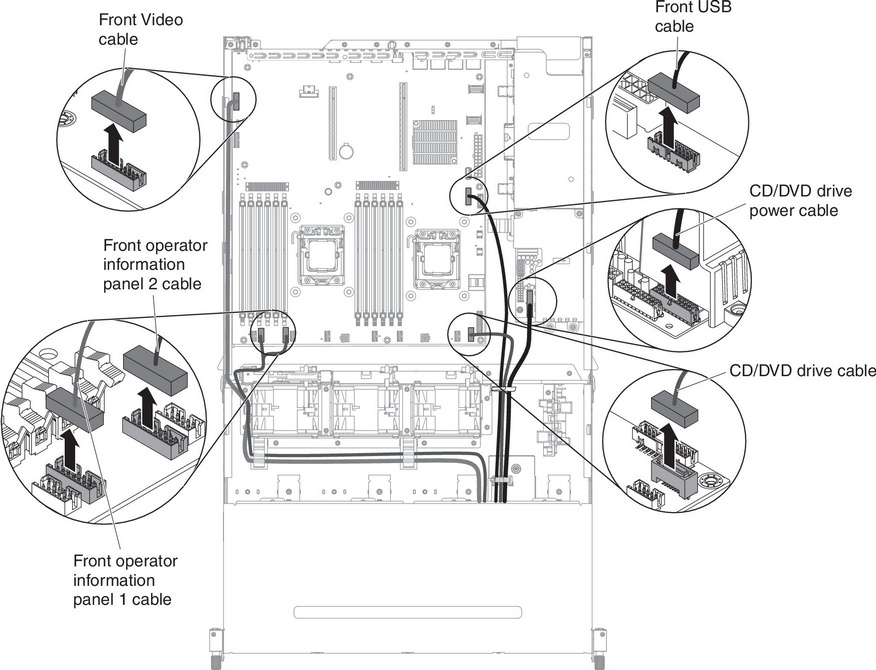
- Disconnect the USB, video, CD/DVD and front operator information panel cables from the system board. Please remember the relevant cable routing.
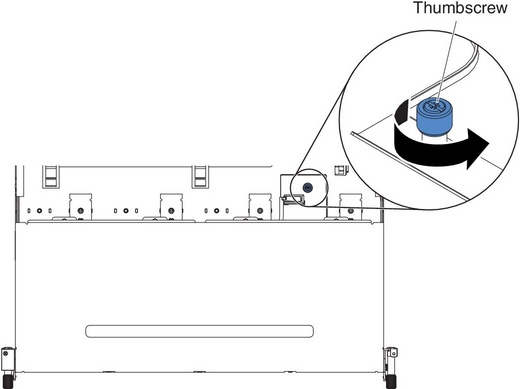
- Loosen the single thumbscrew that is used to secure the media cage onto the server.
- Carefully pull the media cage out of the server.
- Remove the CD/DVD cable from the CD/DVD drive (see step 9 of Removing the CD/DVD cable).
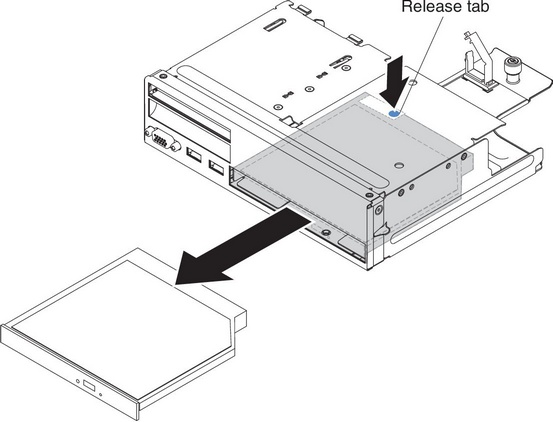
- Locate the blue release tab on the rear of the drive bay; then, while you press down on the blue release tab, slowly push the CD/DVD drive out of the media cage.
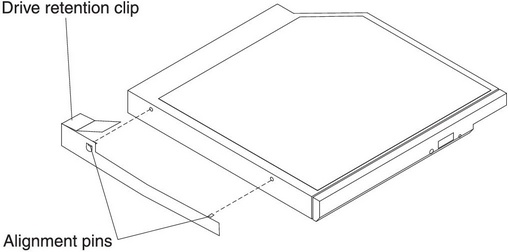
- After removing the CD/DVD drive out of the media cage, slide the drive-retention clip from the side of the drive. Save the clip, as you may need to use it when installing a replacement drive.
- If you are instructed to return the CD/DVD drive, follow all packaging instructions, and use any packaging materials for shipping that are supplied to you.
Give feedback