Replacing an Lenovo ServeRAID SAS/SATA controller
Use this information to replace an Lenovo ServeRAID SAS/SATA controller.
For configuration information, see the ServeRAID SAS/SATA controller documentation at the Lenovo Support Portal.
Important
To ensure that any of your ServeRAID SAS/SATA controllers function properly on UEFI-based servers, make sure that the ServeRAID SAS/SATA controller firmware and supporting device drivers are updated to the latest version.
Read the safety information in Safety and Installation guidelines.
If you are replacing a server component in the server, you need to slide the server out from the rack enclosure, turn off the server and peripheral devices, and disconnect the power cords and all external cables.
Note
For brevity, in this documentation the Lenovo ServeRAID SAS/SATA controller is often referred to as the SAS/SATA adapter or the ServeRAID adapter.
To replace an Lenovo ServeRAID SAS/SATA controller, complete the following steps.
Note
If possible, back up or record your RAID configuration information before replacing the adapter. See the documentation for your RAID adapter for information and instructions. Documentation for ServeRAID adapters can be downloaded from the Lenovo Support Portal.
- Take the signal cable that is attached to the drive backplate assembly/backplane and connect it to the ServeRAID SAS/SATA controller.Figure 1. ServeRAID SAS/SATA controller signal cable connection for simple-swap hard disk drive models (left PCI module connection)
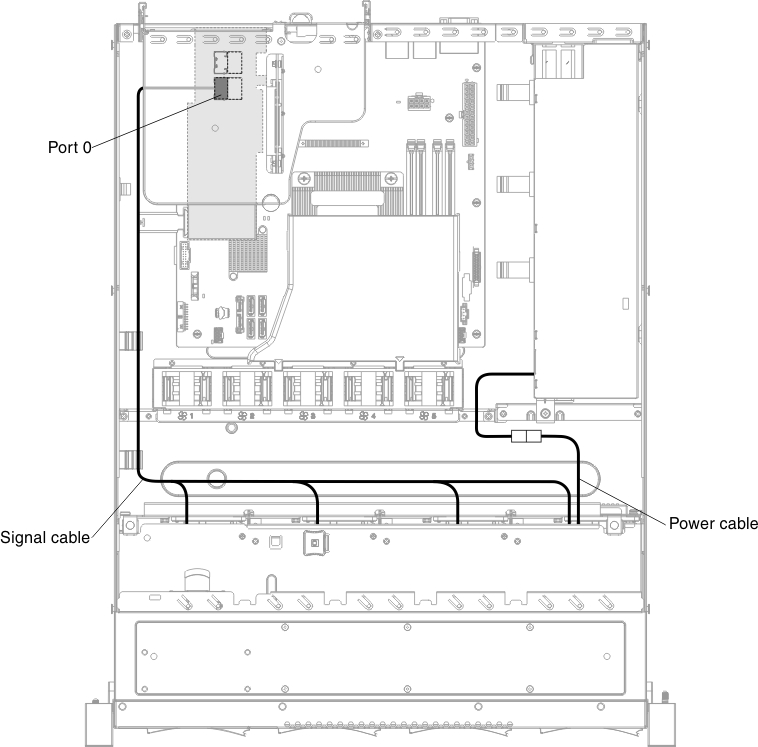 Figure 2. ServeRAID SAS/SATA controller signal cable connection for simple-swap hard disk drive models (right PCI module connection)
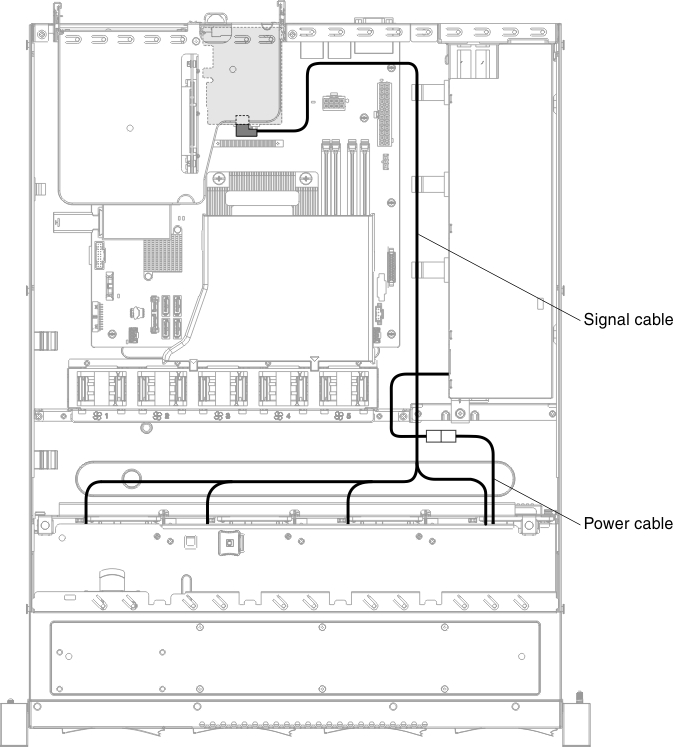 Figure 3. ServeRAID SAS/SATA controller signal cable connection for hot-swap hard disk drive models (left PCI module connection)
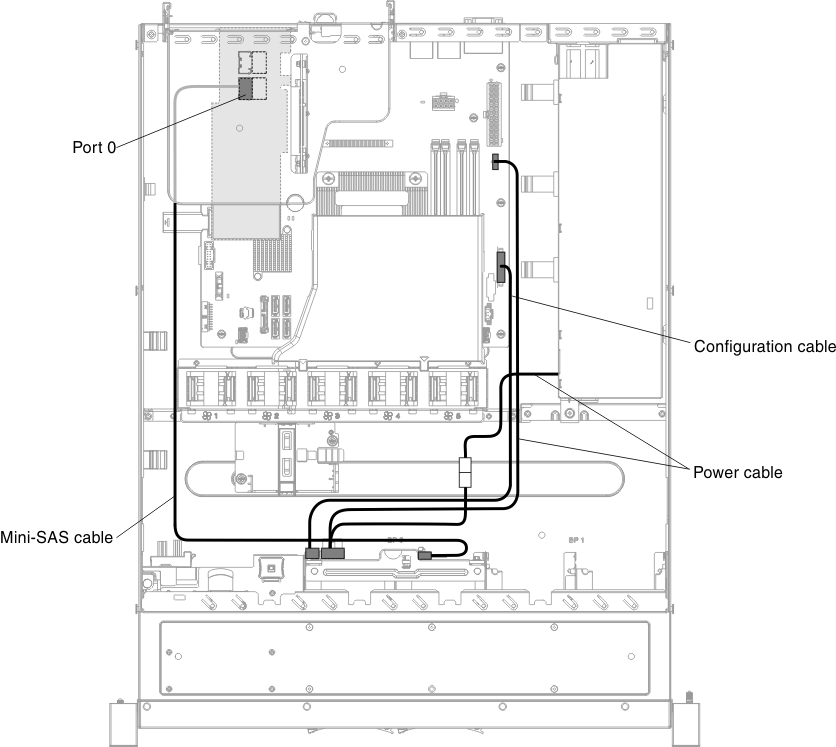 Figure 4. ServeRAID SAS/SATA controller signal cable connection for hot-swap hard disk drive models (right PCI module connection)
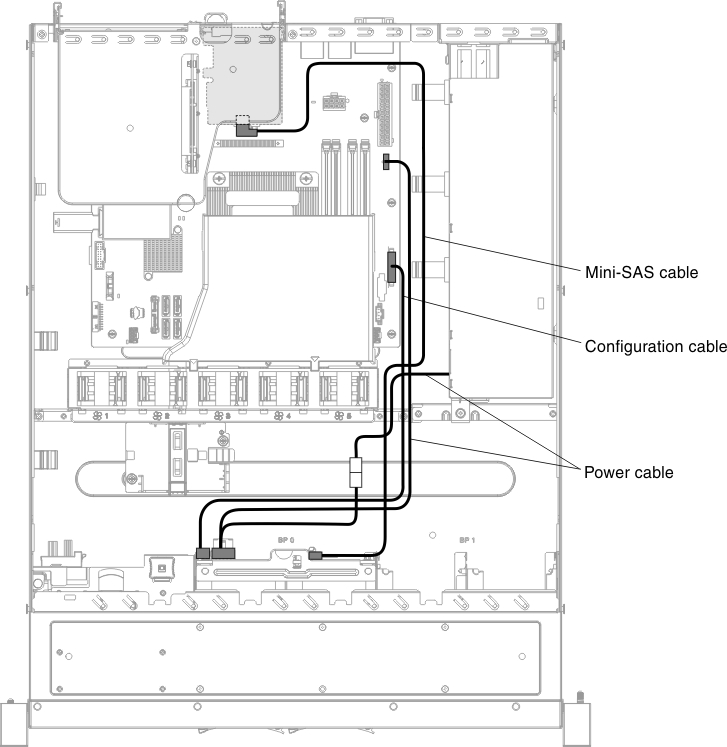 Figure 5. ServeRAID SAS/SATA controller signal cable connection for hot-swap hard disk drive models (left PCI module connection with two backplanes)
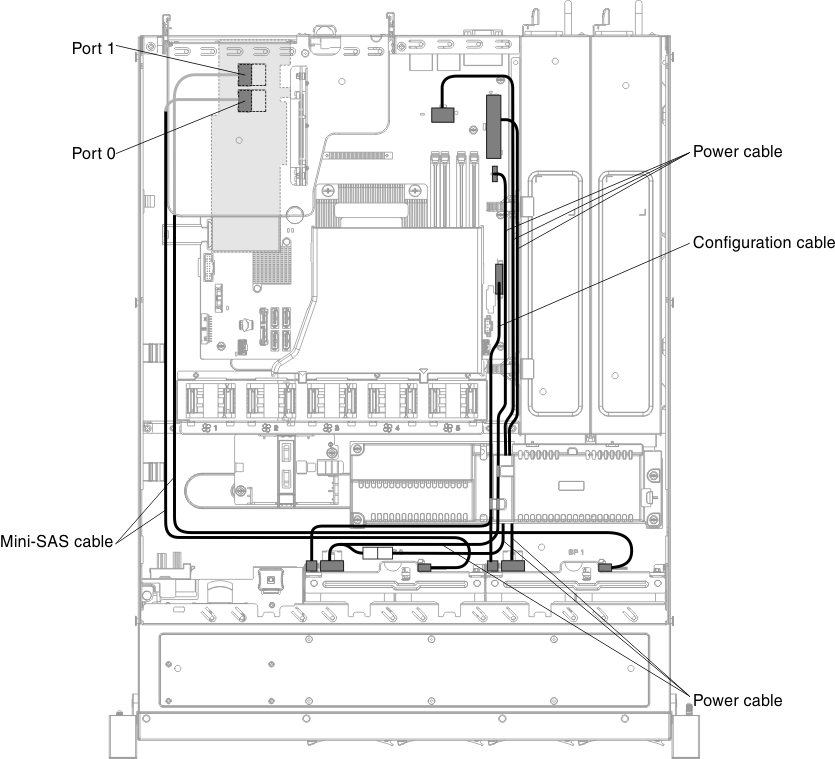
What to do next
- Install the server into the rack enclosure and push the server into the rack until it clicks into place.
- Reconnect the power cords and any cables that you removed.
- Turn on the peripheral devices and the server.
Note
When you restart the server, you are prompted to import the existing RAID configuration to the new ServeRAID SAS/SATA controller.
Give feedback