Installing the optical drive
The following tips describe the type of optical drives that the server supports and other information that you must consider when you install an optical drive. For a list of supported optical drives, go to: the Lenovo ServerProven website
- Locate the documentation that comes with the optical drive and follow those instructions in addition to the instructions in this topic.
- Make sure that you have all the cables and other equipment specified in the documentation that comes with the optical drive.
- The server supports one ultra-slim SATA optical drive.
To install the optical drive, do the following:
- Connect the optical drive cable. Make sure that the cable is not pinched and does not cover any connectors or obstruct any components on the system board.
- Align the cable connector with the connector bracket on the chassis, insert the cable connector into the bracket, and slide it to the left until it is firmly seated.
- Connect the other end of the cable to the system board.
Figure 1. Optical drive cable connection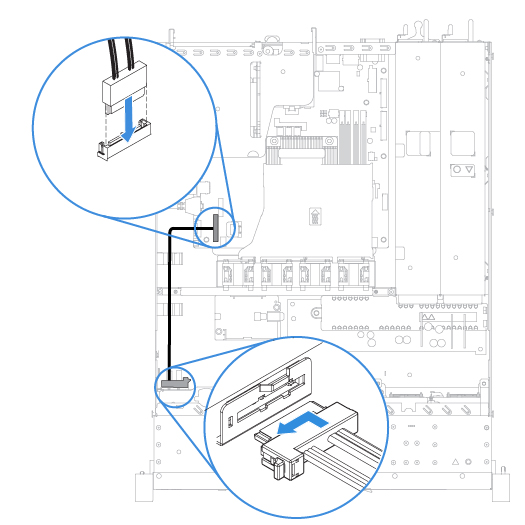
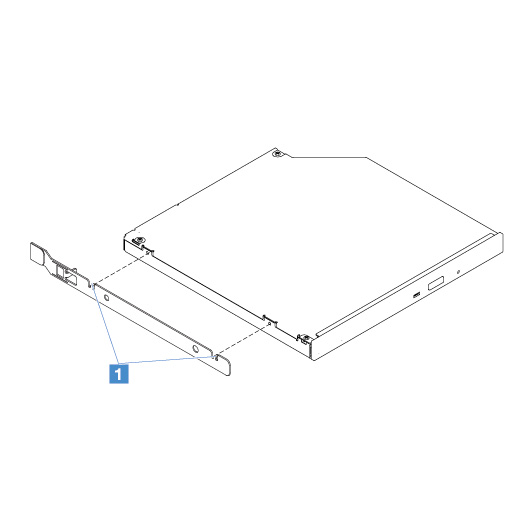
- Attach the drive retention clip that you removed from the optical drive filler to the side of the new optical drive. Ensure that the alignment pins 1 on the retention clip are aligned with the corresponding holes in the optical drive.Figure 2. Optical drive retention clip installation
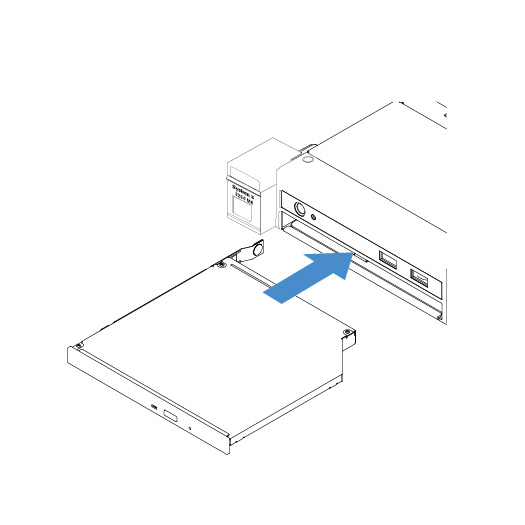
- Align the optical drive with the drive bay. Then, slide the optical drive into the bay until the optical drive clicks into place.Figure 3. Optical drive installation
Give feedback