Installing the 2.5-inch hot-swap hard-disk-drive backplane
The following illustration shows contents of the second 2.5-inch hard-disk-drive backplane upgrade kit:
Figure 1. The second 2.5-inch hard-disk-drive backplane upgrade kit
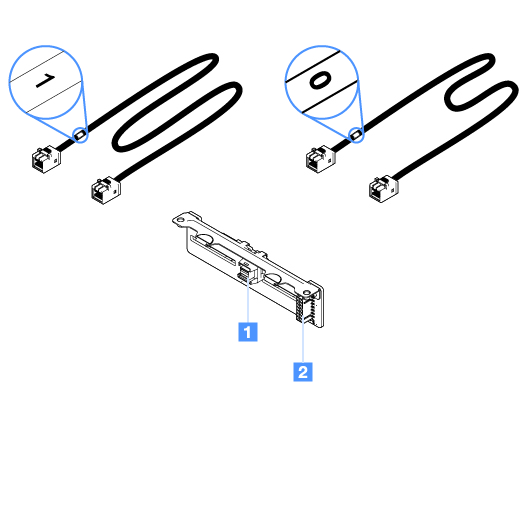
1 Mini-SAS signal cable connector
2 Power connector
To install the 2.5-inch hot-swap hard-disk-drive backplane, do the following:
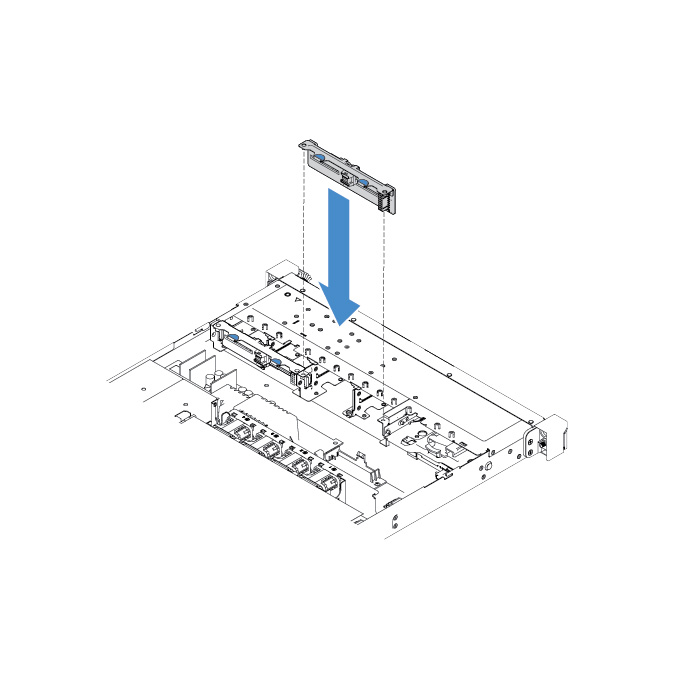
- Align the backplane with the backplane alignment slots in the chassis. Then, carefully lower the hard-disk-drive backplane until it is fully seated in the chassis.Figure 2. 2.5-inch hot-swap hard-disk-drive backplane installation
Give feedback