Removing the front I/O assembly
The front I/O assembly contains an operator information panel and two cables.
To remove the front I/O assembly, do the following:
- Disconnect the USB cable and the operator information panel cable from the system board.
- To release the USB cable connector, press the release latch 1 on the top of the USB cable connector. Then, pull out and disengage the USB cable connector from the USB connector on the system board.
- To release the operator information panel cable connector, press the release latches 2 on both sides of the cable connector. Then, pull out and disengage the cable connector from the operator information panel connector on the system board.
Figure 1. USB cable and operator information panel cable disconnection
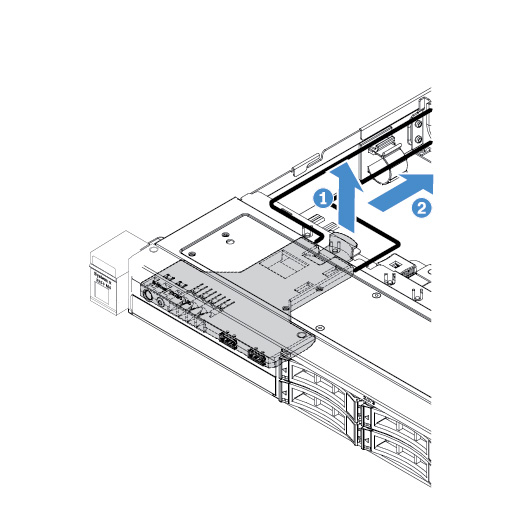
- Locate the release tab on the rear of the front I/O assembly. Then, lift the release tab and carefully pull out the front I/O assembly.Figure 2. Front I/O assembly removal
Give feedback