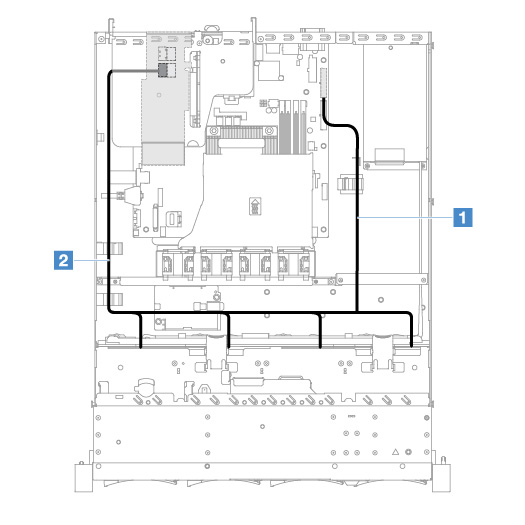
Simple-swap HDD cable connection: ServeRAID SAS/SATA controller and fixed power supply
1: Connect to the backplane power connector on the system board and the power connector on the hard-disk-drive backplate assembly.
2: Connect to the connector 0 on the ServeRAID SAS/SATA controller and the four connectors on the hard-disk-drive backplate assembly.
Note
The Mini-SAS cable has been installed to the hard-disk-drive backplate assembly by default.
Ensure that the cable is not pinched and does not cover any connectors or obstruct any components on the system board.
Ensure the power cable and Mini-SAS cable pass through the cable clips.
Figure 1. Simple-swap HDD cable connection: 2.5-inch, ServeRAID SAS/SATA controller installed on the right side
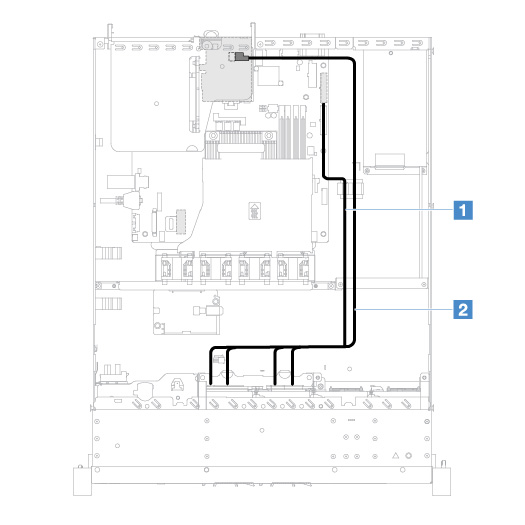
Figure 2. Simple-swap HDD cable connection: 2.5-inch, ServeRAID SAS/SATA controller installed on the left side

Figure 3. Simple-swap HDD cable connection: 3.5-inch, ServeRAID SAS/SATA controller installed on the right side
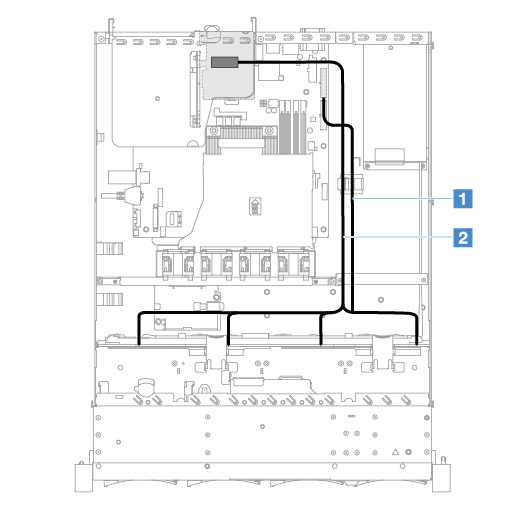
Figure 4. Simple-swap HDD cable connection: 3.5-inch, ServeRAID SAS/SATA controller installed on the left side
Give feedback