Replacing a system fan
Use this information to replace a system fan in the server.
Read the safety information in Safety and Installation guidelines.
If you are replacing a server component in the server, you need to turn off the server and peripheral devices, and disconnect the power cords and all external cables.
Attention
Static electricity that is released to internal server components when the server is powered-on might cause the server to halt, which might result in the loss of data. To avoid this potential problem, always use an electrostatic-discharge wrist strap or other grounding system when you work inside the server with the power on.
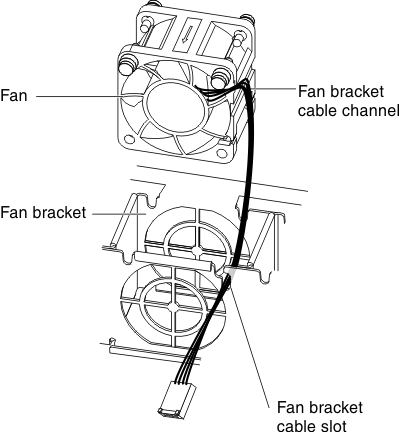
To replace a system fan, complete the following steps.
- Position the replacement fan so that the airflow arrow on the fan points toward the rear of the server.NoteThe correct airflow is from the front to the rear of the server.Figure 1. System fan installation
If you have replaced a server component or installed an optional device in the server, you need to reconnect the power cords and all external cables, and turn on the server and peripheral devices.
Give feedback