Replacing a ServeRAID adapter
Use this information to replace an IBM ServeRAID adapter.
For configuration information, see the ServeRAID documentation at the Lenovo Support Portal.
Important
To ensure that any of your ServeRAID adapters function properly on UEFI-based servers, make sure that the adapter firmware and supporting device drivers are updated to at least 11.x.x-XXX.
Read the safety information in Safety and Installation guidelines.
If you are replacing a server component in the server, you need to turn off the server and peripheral devices, and disconnect the power cords and all external cables.
To replace an IBM ServeRAID adapter, complete the following steps.
Note
If possible, backup or record your RAID configuration information before replacing the adapter. See the documentation for your RAID adapter for information and instructions. Documentation for ServeRAID adapters can be downloaded from the Lenovo Support Portal.
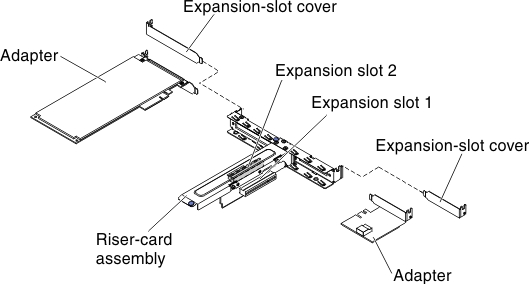
- Remove the expansion-slot cover on the slot that you intend to use and save for future use.AttentionPCI expansion-slot covers must be installed on all vacant slots. This maintains the electronic emissions standards of the server and ensures proper ventilation of server components.Figure 1. ServeRAID adapter installation.
- Take the signal cable that is attached to the drive backplane and connect it to the ServeRAID adapter.
- If you install a ServeRAID-BR10il v2 adapter in slot 1 on the PCI riser-card assembly, route the signal cable from the drive backplane as shown in the following illustration.
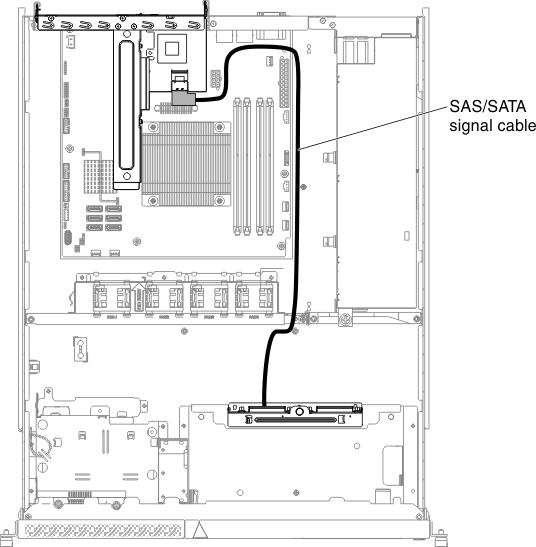
- If you install a ServeRAID-M1050 or ServeRAID-M5014 adapter in slot 2 on the PCI riser-card assembly, route the signal cable from the drive backplane through the fan cage hole on the left of fan 1 as shown in the following illustration. Connect the signal cable to Port 0 on the ServeRAID adapter.Note
- You must connect the signal cable to Port 0 on a ServeRAID-M1050 or ServeRAID-M5014 adapter.
- Secure the cable on the system board with cable tie after routing.
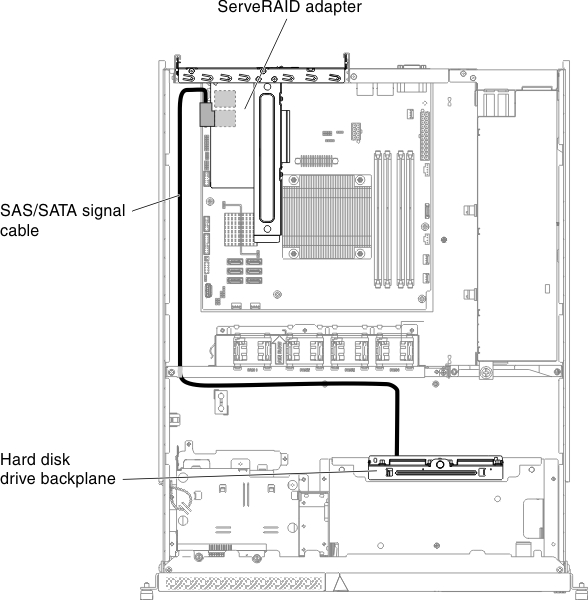
- If you install a ServeRAID-BR10il v2 adapter in slot 1 on the PCI riser-card assembly, route the signal cable from the drive backplane as shown in the following illustration.
If you have replaced a server component or installed an optional device in the server, you need to reconnect the power cords and all external cables, and turn on the server and peripheral devices.
Note
When you restart the server, you are prompted to import the existing RAID configuration to the new ServeRAID adapter.
Give feedback