Removing a simple-swap hard disk drive
Use this information to remove a simple-swap hard disk drive.
Important
Before you remove a simple-swap hard disk drive from the server, take the following precautions to save data, firmware, and configuration data:
- Before you make changes to disk drives, disk drive controllers (including controllers that are integrated on the system board), disk drive backplates, or disk drive cables, back up all important data that is stored on hard disks.
- Before you remove any component of a RAID array, back up all RAID configuration information.
To remove a simple-swap hard disk drive from the bay, complete the following steps:
Read the safety information in Safety and Installation guidelines.
If you are replacing a server component in the server, you need to turn off the server and peripheral devices, and disconnect the power cords and all external cables.
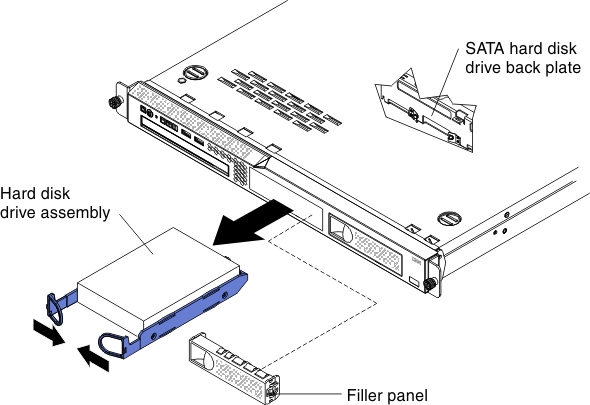
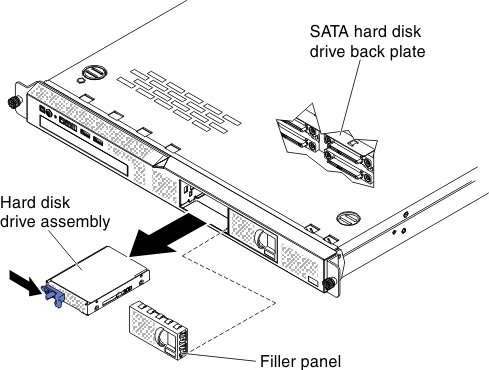
- Remove the hard disk drive:
- To remove a 3.5-inch simple-swap hard disk drive, pull the loops of the drive tray toward each other and pull the drive out of the bay.
- To remove a 2.5-inch simple-swap hard disk drive, press the release latch and pull the drive out of the bay.
- To remove a 3.5-inch simple-swap hard disk drive, pull the loops of the drive tray toward each other and pull the drive out of the bay.
If you are instructed to return the server component or optional device, follow all packaging instructions, and use any packaging materials for shipping that are supplied to you.
Give feedback