Installing a simple-swap hard disk drive
Use this information to install a simple-swap hard disk drive.
Read the safety information in Safety and Installation guidelines.
If you are installing an optional device in the server, turn off the server and peripheral devices, and disconnect the power cords and all external cables.
To install a simple-swap hard disk drive, complete the following steps:
- Remove the filler panel from the empty drive bay.
- Touch the static-protective package that contains the drive to any unpainted metal surface on the server; then, remove the drive from the package and place it on a static-protective surface.
- Install the hard disk drive in the drive bay:
- Grasp the black drive handle and slide the blue release latch to the right and align the drive assembly with the guide rails in the bay.Figure 1. 2.5-inch simple-swap hard disk drive installation
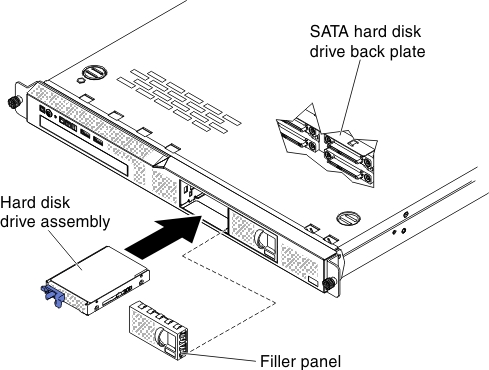 Figure 2. 3.5-inch simple-swap hard disk drive installation
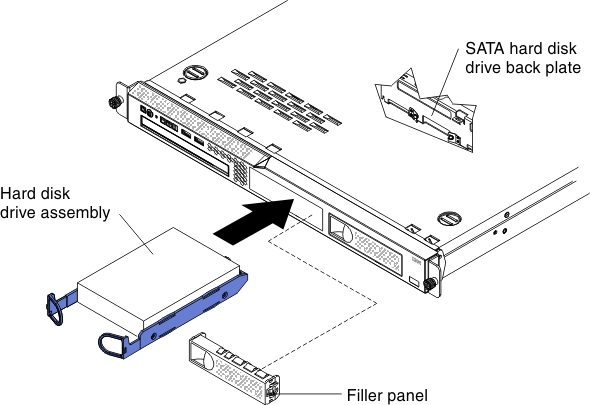
- Grasp the black drive handle and slide the blue release latch to the right and align the drive assembly with the guide rails in the bay.
- Reinstall the drive bay filler panel that you removed earlier.
- If you are installing additional simple-swap hard disk drives, do so now.
If you have other devices to install, do so now. Otherwise, go to Completing the installation.
Give feedback