You can replace a faulty 2.5-inch drive assembly with
a new one received from CRU / FRU stock.
The status of the drive must be such that it is not a
spare or a member. The status is shown in in the management GUI.
Attention:
- Do not replace a drive unless the
drive fault LED is on or you are instructed to do so by a fix procedure.
- If the drive is a member of an array, go to the management GUI and follow the fix procedures. The fix procedures
mitigate loss of data and loss of access to data and manage use of
the drive by the system.
- Do not leave a drive slot empty for extended periods. Do not remove
a drive assembly or a blank filler without having a replacement drive
or a blank filler with which to replace it.
To prepare to replace a drive assembly, complete the
following steps.
- Read the safety information in Preparing to remove and replace parts.
- Locate the slot that contains the drive assembly that you
want to replace.
- Refer to Procedure: Identifying which Lenovo Storage V7000 Gen2 enclosure or canister to service to ensure correct identification of the correct system or
enclosure.
- The drive slots on the front are numbered 1 - 24, starting
from the far left slot of the enclosure.
- If the drive in the slot is faulty, the lit, amber fault
LED on the drive helps to identify it.
- To further help identify the drive assembly, go to the management GUI to , select the drive to replace, and
click . Verify that the correct drive fault LED begins to
flash.
Attention: Never hot-swap a hard disk drive when
its green activity LED is flashing. Hot-swap a drive only when its
amber fault LED is lit (not flashing) or when the drive activity LED
is off.
To remove a drive assembly, complete the following steps.
- Gently slide the orange release latch up to unlock the
handle.
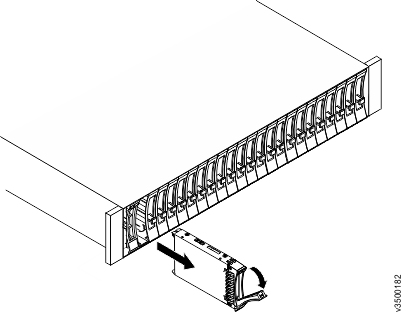
- Pull out the tray handle to the open position (see Figure 1).
- Grasp its handle and pull the drive partially out of the
bay.
- Wait at least 20 seconds before you remove the drive assembly
from the enclosure to enable the drive to spin down.
This avoids possible damage to the drive.
- Gently slide it completely out of the enclosure.
- Make sure that there is proper identification (such as
a label) on the drive assembly.
If the drive failed, record that information
on the label.
To install a drive assembly, complete the following steps.
- Touch the static-protective package that contains the drive
assembly to any unpainted surface on the outside of the enclosure.
- Remove the drive assembly from its package.
- Make sure that its drive-tray handle is in the open (unlocked)
position.
- Align the drive assembly with the guide rails in the bay
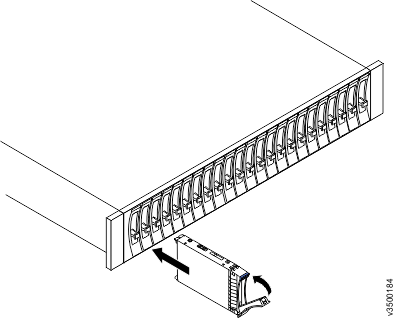
(see Figure 2).
- Gently push the drive assembly into the bay until the drive
stops.
- Rotate the drive handle to the closed (locked) position.
Figure 1. Unlocking and removing a 2.5-inch drive from its slot
Figure 2. Installing and locking a 2.5-inch drive into its slot
If the replaced drive was a
failed drive, the system automatically reconfigures the replacement
drive as a spare and the replaced drive is removed from the configuration.
The process can take a few minutes.