Following
your enclosure location plan, install the control enclosure.
CAUTION:
- Load the rack from the bottom up to ensure rack stability. Empty
the rack from the top down.
To install an enclosure, complete the following steps.
- On either side of the drive assemblies, remove the enclosure
end caps by grasping the handle and pulling the bottom of the end
cap free, then clearing the tab on the top of the enclosure.
- Align the enclosure with the front of the rack cabinet.
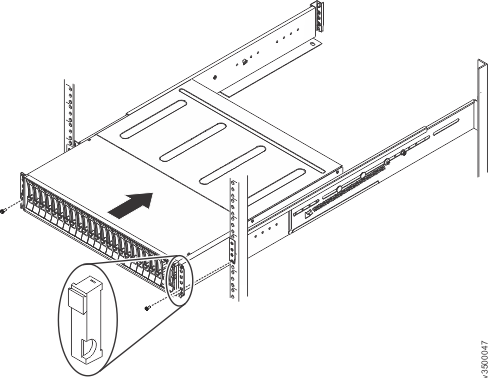
- Slide the enclosure into the rack along the rails until
the enclosure is fully inserted. (See Figure 1.)
Note: The rails are not designed to hold an enclosure that is
partially inserted. The enclosure must always be in a fully inserted
position.
Figure 1. Inserting the enclosure
- Secure each flange on the front
of the enclosure with two black M5 screws.
- Reinstall the left and right end
caps.
(See Figure 1.) The left end
cap has indicator windows that align with the status LEDs (light-emitting
diodes) on the edge of the enclosure.
- Ensure that the serial number on the left end cap matches
the serial number on the left flange ("ear") on the front of the enclosure.
- Fit the slot on the top of the end cap over the tab
on the flange.
- Rotate the end cap down until it snaps into place.
- Ensure that the inside surface of the end cap is flush
with the flange.
If you removed components from the enclosure to lift it,
reinstall the components into the slots of the enclosure from which
they were removed.
