If you purchased disk drives that were not preinstalled for you, you must install them.
Install all the drives you require before configuring the system. This allows the best provisioning of drives into arrays.
To install a drive, complete the following steps.
- Remove the filler panel from the slot into which
you want to install the drive (as shown in Figure 1).
- Grip the front of the filler panel 1 and pull firmly to remove it from the the drive slot.
- Save the filler panel for future use.
Figure 1. Removing a filler panel
- 1 Filler panel
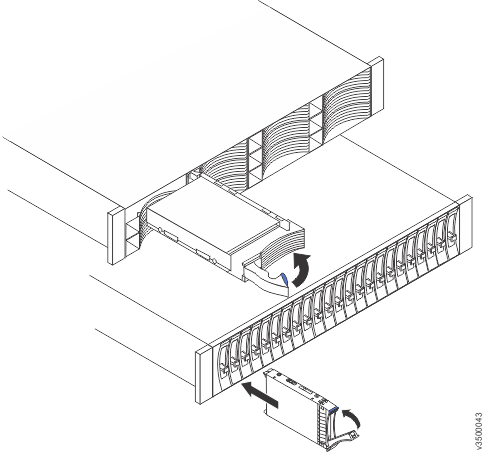
- Install the drive in the empty slot as shown in Figure 2.
- Ensure that the drive-tray handle is in the open (unlocked) position.
- Align the drive assembly with the guide rails in the slot.
- Gently push the drive assembly into the slot until the drive stops.
- Rotate the drive handle to the closed (locked) position.
Figure 2. Installing a drive