Using the embedded hypervisor
The VMware ESXi embedded hypervisor is available on server models that come with an installed USB embedded hypervisor flash device.
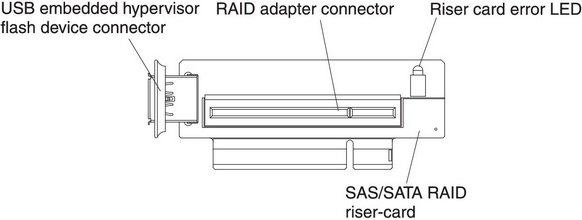
The USB flash device comes installed in the USB connector on the SAS/SATA RAID riser card (see the following illustration). Hypervisor is virtualization software that enables multiple operating systems to run on a host system at the same time. The USB flash device is required to activate the hypervisor functions.
Figure 1. USB embedded hypervisor flash device connector
To start using the embedded hypervisor functions, you must add the USB flash device to the boot order in the Setup utility.
To add the USB flash device to the boot order, complete the following steps:
Recovering the flash device image
If the embedded hypervisor flash device image becomes corrupt, you can use the VMware Recovery CD to recover the flash device image.
To recover the flash device image, complete the following steps:
For additional information and instructions, see the ESXi Embedded and vCenter Server Setup Guide at ESXi Embedded and vCenter Server Setup Guide.
Give feedback