Removing a simple-swap hard disk drive
Use this information to remove a simple-swap hard disk drive.
You must turn off the server before removing simple-swap drives from the server. To remove a simple-swap SATA hard disk drive, complete the following steps.
Attention
- To avoid damage to the hard disk drive connectors, make sure that the server cover is in place and fully closed whenever you install or remove a hard disk drive.
- To make sure that there is adequate system cooling, do not operate the server for more than 2 minutes without either a hard disk drive or a filler panel installed in each bay.
To remove a simple-swap hard disk drive, complete the following steps.
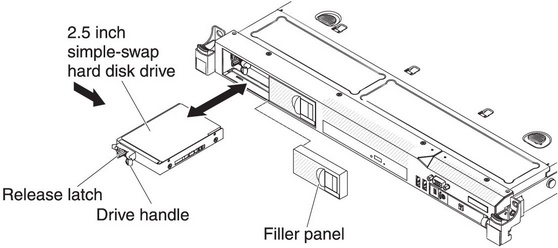
- Slide the blue release latch to the right with one finger (to release the drive) while using another finger to grasp the black drive handle and pull the hard disk drives out of the drive bay.Figure 1. Simple-swap hard disk drive removal
If you are instructed to return the simple-swap drive, follow all packaging instructions, and use any packaging materials for shipping that are supplied to you.
Give feedback