
Removing the simple-swap SATA hard disk drive backplate assembly

Use this information to remove the simple-swap SATA hard disk drive backplate assembly.

To remove the simple-swap SATA hard disk drive backplate assembly, complete the following steps:

  1. Read the safety information that begins on Safety and Installation guidelines.
  2. Turn off the server and peripheral devices and disconnect the power cords and all external cables.
  3. Remove the cover (see Removing the cover).
  4. Slide the blue release tab to the right with one finger while using another finger to grasp the black drive handle and pull the hard disk drives out of the server slightly (also the filler panels) to disengage them from the hard disk drive backplate.
  5. Disconnect the power and signal cables from the system board.
    Note
    You can also choose to disconnect the cables after you remove the backplate from the brackets, if that is easier for you.
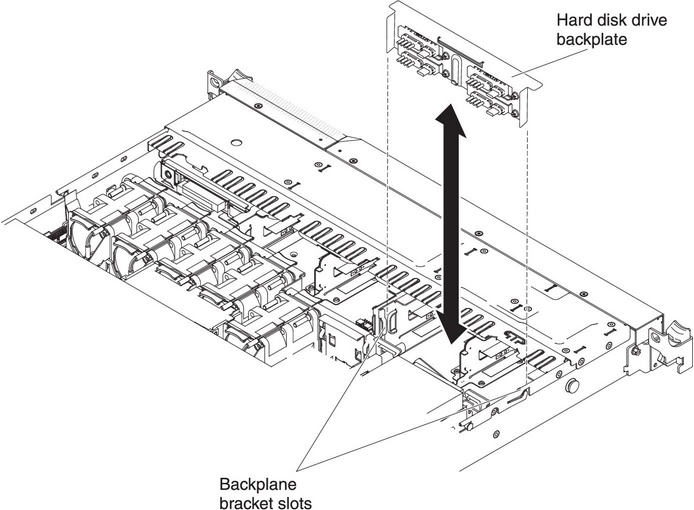
  6. Lift the hard disk drive backplate up to disengage the backplate assembly from the backplane bracket and remove it from the server.
    Figure 1. Backplate assembly removal
    Backplate assembly removal

If you are instructed to return the hard disk drive backplate assembly, follow all packaging instructions, and use any packaging materials for shipping that are supplied to you.