
Installing the 240 VA safety cover

Use this information to install the 240 VA safety cover.

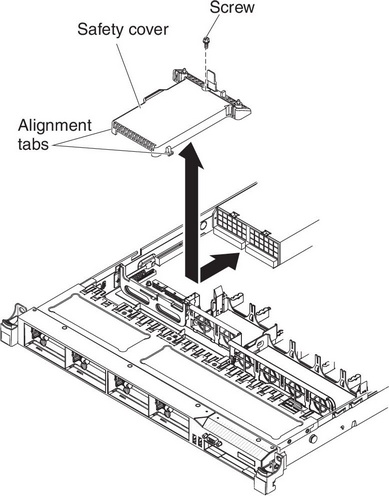
To install the 240 VA safety cover, complete the following steps:

  1. Read the safety information that begins on Safety and Installation guidelines.
  2. Turn off the server and peripheral devices and disconnect the power cords and all external cables.
  3. Remove the cover (see Removing the cover).
  4. Remove the SAS/SATA riser-card assembly (see Removing the SAS/SATA RAID riser-card assembly).
  5. Align the tabs on the bottom of the safety cover with the slots on the system board and lower the safety cover into the system board.
    Figure 1. Safety cover installation
    Safety cover installation
  6. Slide the safety cover toward the back of the server until it is secure.
  7. Connect the hard disk drive backplane cables into the connector in front of the safety cover.
  8. Install the screw to secure the safety cover.
  9. Install the SAS/SATA riser-card assembly (seeInstalling the SAS/SATA RAID riser-card assembly).
  10. Install the cover (see Installing the cover).
  11. Slide the server into the rack.
  12. Reconnect the power cords and any cables that you removed.
  13. Turn on the peripheral devices and the server.