
Installing a RAID adapter battery remotely in the server

Use this information to install a RAID adapter battery remotely in the server.

The batteries must be installed only on top of the microprocessor 2 air baffle. To install the RAID adapter battery in the server, complete the following steps:

  1. Read the safety information that begins on Safety and Installation guidelines.
  2. Turn off the server and peripheral devices and disconnect the power cords.
  3. Remove the cover (see Removing the cover).
  4. Install the RAID adapter on the riser card and install the riser-card assembly in the server (see Installing a PCI riser-card assembly).
  5. Route the remote battery cable through the notches on the microprocessor 2 air baffle.
    Attention
    Make sure that the cable is not pinched and does not cover any connectors or obstruct any components on the system board.
  6. Install the battery on the microprocessor 2 air baffle:
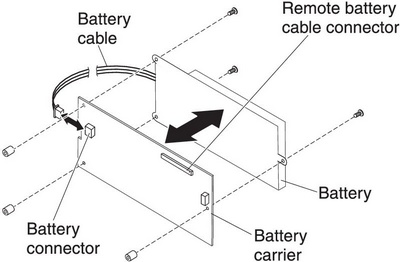
    1. Connect the battery cable to the battery cable connector on the battery carrier.
      Figure 1. Battery installation
      Battery installation
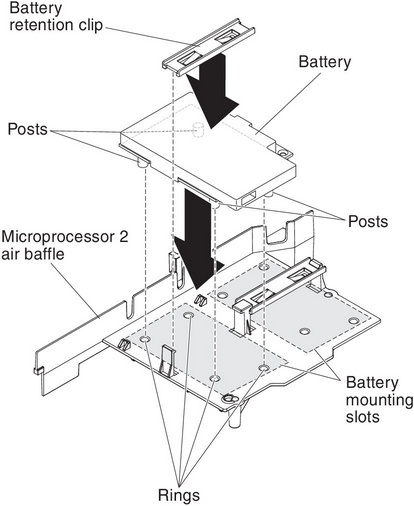
    2. Place the battery carrier in the battery mounting slot on the microprocessor 2 air baffle and ensure that battery carrier posts align with the rings on the battery mounting slot so that the battery carrier is secure in the slot.
      Note
      The positioning of the remote battery depends on the type of remote battery that you install.
      Figure 2. Battery installation
      Battery installation
    3. Take the battery retention clip and place it underneath the other tab while pressing release tab toward the front of the server; then, press it down until it snaps in place to hold the battery carrier firmly in place.
  7. Install the cover.
  8. Slide the server into the rack.
  9. Reconnect the power cords and all external cables, and turn on the server and peripheral devices.