
Removing the front USB connector board

Use this information to remove the front USB connector board.

To remove the front USB connector board, complete the following steps:

  1. Read the safety information that begins in Safety and Installation guidelines.
  2. Turn off the server (see Turning off the server) and all attached peripheral devices. Disconnect all power cords; then, disconnect all external cables as necessary to replace the device.
  3. Remove the server cover (see Removing the server top cover).
  4. Disconnect the USB cable from the connector on the rear of the USB assembly.
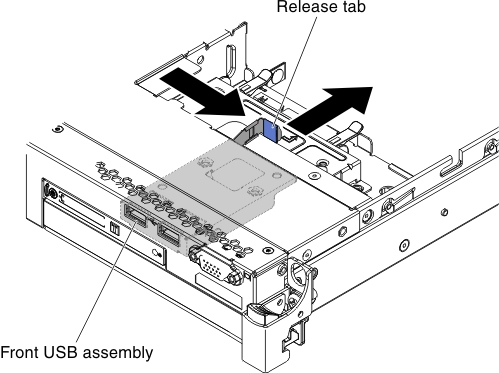
  5. (For 2.5-inch hard disk drive models) Press the release tab and push the USB assembly toward the rear of the server.
    Figure 1. Front USB connector board removal (for 2.5-inch HDD models)
    Front USB connector board removal (for 2.5-inch HDD models)
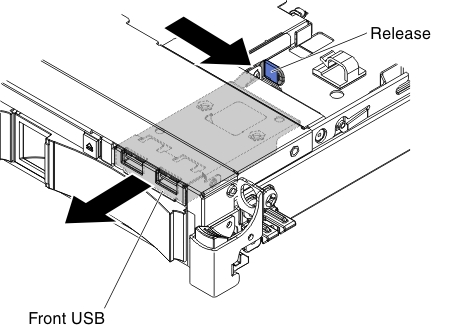
  6. (For 3.5-inch hard disk drive models) Press the release tab and push the USB assembly toward the front of the server.
    Figure 2. Front USB connector board removal (for 3.5-inch HDD models)
    Front USB connector board removal (for 3.5-inch HDD models)
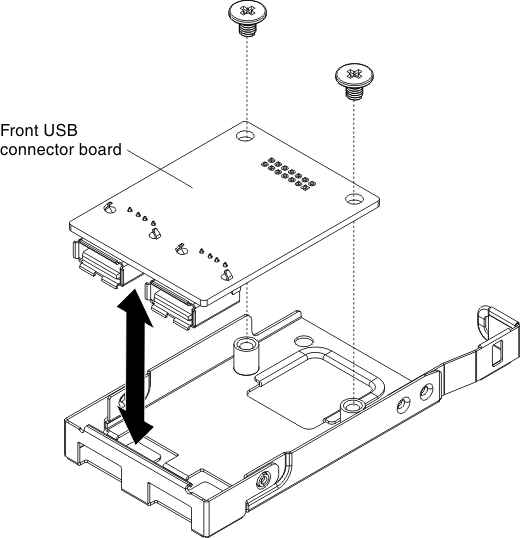
  7. Remove the two screws from the USB assembly and rotate the front USB connector board out of the USB assembly.
    Figure 3. USB assembly screws removal
    USB assembly screws removal
  8. If you are instructed to return the front USB connector board, follow all packaging instructions, and use any packaging materials for shipping that are supplied to you.