
Removing the simple-swap SATA drive backplate assembly

Use this information to remove the simple-swap drive SATA drive backplate assembly.

To remove the simple-swap SATA drive backplate assembly, complete the following steps:

  1. Read the safety information that begins in Safety and Installation guidelines.
  2. Turn off the server (see Turning off the server) and all attached peripheral devices. Disconnect all power cords; then, disconnect all external cables as necessary to replace the device.
  3. Remove the server cover (see Removing the server top cover).
  4. Pull the drive and filler panels out of the server slightly to disengage them from the backplate assembly.
  5. Disconnect the cables. Note the routing
    1. Disconnect the signal cable from the connector on the system board.
    2. Disconnect the power cable from the power supply or the power interposer card.
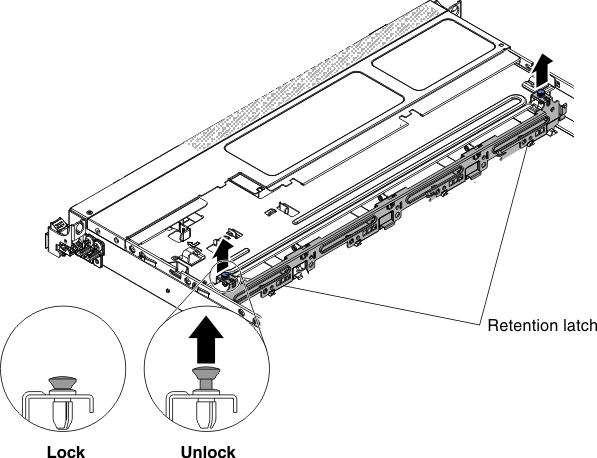
  6. Pull the retention latch on top of the drive backplane cage and lift the backplate assembly up slightly and pull it out; then, rotate it backward out of the tabs at the bottom of the drive cage and remove the backplate assembly from the server.
    Figure 1. Simple-swap SATA drive backplate assembly removal
    Simple-swap SATA drive backplate assembly removal
  7. If you are instructed to return the backplate assembly, follow all packaging instructions, and use any packaging materials for shipping that are supplied to you.