Use this information to install simple-swap hard disk drives.
To install a simple-swap SATA drive, complete the following steps.
If you install only one drive, you must install it in drive bay 0.
- Read the safety information that begins in Safety and Installation guidelines.
- Turn off the server (see Turning off the server) and all attached peripheral devices. Disconnect all power cords; then, disconnect all external cables as necessary to replace the device.
- Touch the static-protective package that contains the drive to any unpainted metal surface on the server; then, remove the drive from the package and place it on a static-protective surface.
- Install the hard disk drive in the drive bay
- Remove the filler panel from the empty drive bay.
- Align the drive assembly with the guide rails in the bay.
Figure 1. 3.5-inch simple-swap hard disk drive installation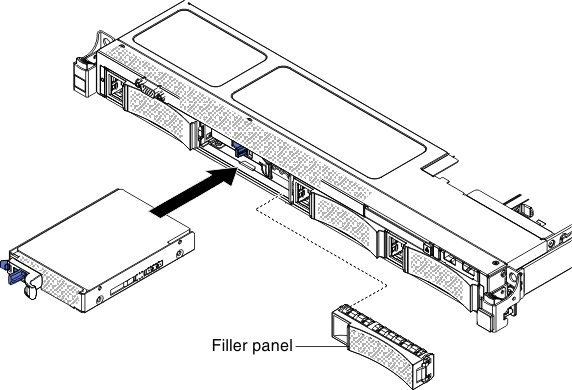
Figure 2. 2.5-inch simple-swap hard disk drive installation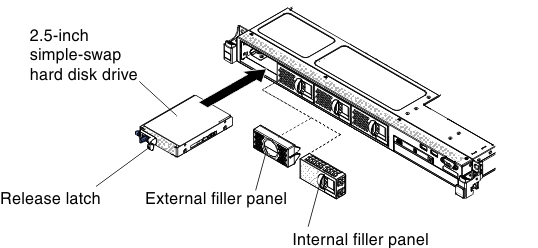
- Gently slide the drive assembly into the drive bay until it clicks into place.
- Install the filler panel.
- If you are installing additional simple-swap drives, do so now.
- Restart the server. Confirm that it starts correctly and recognizes the newly installed devices, and make sure that no error LEDs are lit.
If the server is configured for RAID operation using a ServeRAID adapter, you might have to reconfigure your disk arrays after you install drives. See the ServeRAID adapter documentation for additional information about RAID operation and complete instructions for using the ServeRAID adapter.