Installing hot-swap drives
Use this information to install a hot-swap hard disk drive.
Note
If you install only one drive, you must install it in drive bay 0.
To install a hot-swap SAS or SATA drive, complete the following steps:
- Installing a 3.5-inch hot-swap drive:
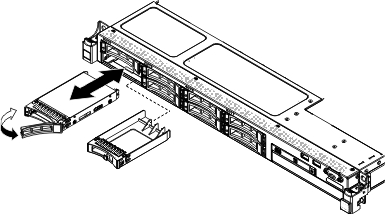
 Figure 1. Hot-swap hard disk drive installation (3.5-inch)
- Remove the filler panel from the empty drive bay.
- Make sure that the drive-tray handle is in the open (unlocked) position.
- Align the drive assembly with the guide rails in the bay.
- Gently push the drive assembly into the drive bay until the drive stops.
- Rotate the drive-tray handle to the closed (locked) position.
- Skip to step 5.
- Installing a 2.5-inch hot-swap drive: Figure 2. Hot-swap hard disk drive installation (2.5-inch)
- Remove the filler panel from the empty drive bay.
- Make sure that the drive-tray handle is in the open (unlocked) position.
- Align the drive assembly with the guide rails in the bay.
- Gently push the drive assembly into the drive bay until the drive stops.
- Rotate the drive-tray handle to the closed (locked) position.
For information on the supported combination of drive backplane configurations, see Supported SAS/SATA drive backplane configurations.
Give feedback