Replacing the PCI riser-card assembly
Use this information to replace the PCI riser-card assembly.
Read the safety information in Safety and Installation guidelines.
If you are replacing a server component in the server, you need to slide the server out from the rack enclosure, turn off the server and peripheral devices, and disconnect the power cords and all external cables.
To replace the PCI riser-card assembly, complete the following steps.
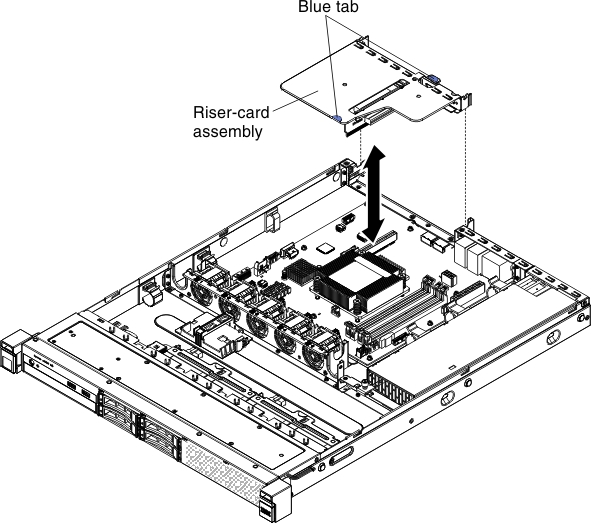
- Carefully align the PCI riser-card assembly with the guides on the rear of the server and with the PCI riser-card connector on the system board; then, place your thumbs on locations marked by the blue tabs and press down on the PCI riser-card assembly. Make sure that the riser-card assembly is fully seated in the connector on the system board.Figure 1. PCI riser-card assembly installation
What to do next
- Install the server into the rack enclosure and push the server into the rack until it clicks into place.
- Reconnect the power cords and any cables that you removed.
- Turn on the peripheral devices and the server.
Give feedback