Replacing the 2.5-inch simple-swap hard disk drive backplate assembly
Use this information to replace the 2.5-inch simple-swap hard disk drive backplate assembly.
Read the safety information in Safety and Installation guidelines.
If you are replacing a server component in the server, you need to slide the server out from the rack enclosure, turn off the server and peripheral devices, and disconnect the power cords and all external cables.
To replace the 2.5-inch simple-swap hard disk drive backplate assembly, complete the following steps:
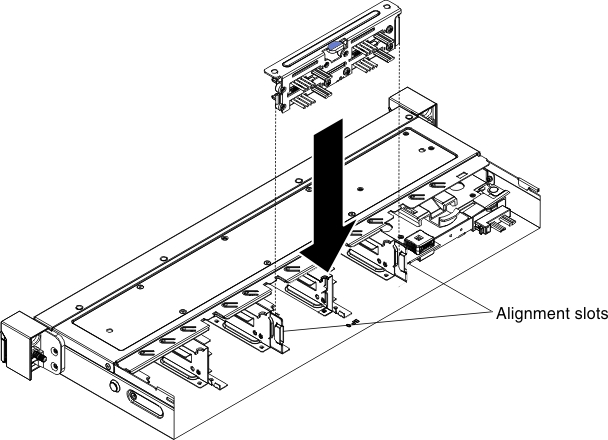
- Lower the backplate assembly into the slot in the chassis until the front tab clicks into the latches on the chassis.Figure 1. 2.5-inch simple-swap hard disk drive backplate assembly installation
What to do next
- Install the server into the rack enclosure and push the server into the rack until it clicks into place.
- Reconnect the power cords and any cables that you removed.
- Turn on the peripheral devices and the server.
Give feedback