Removing the fixed power supply
Use this information to remove the fixed power supply.

Hazardous voltage, current, and energy levels are present inside any component that has this label attached. There are no serviceable parts inside these components. If you suspect a with one of these parts, contact a service technician.
Read the safety information in Safety and Installation guidelines.
If you are replacing a server component in the server, you need to slide the server out from the rack enclosure, turn off the server and peripheral devices, and disconnect the power cords and all external cables.
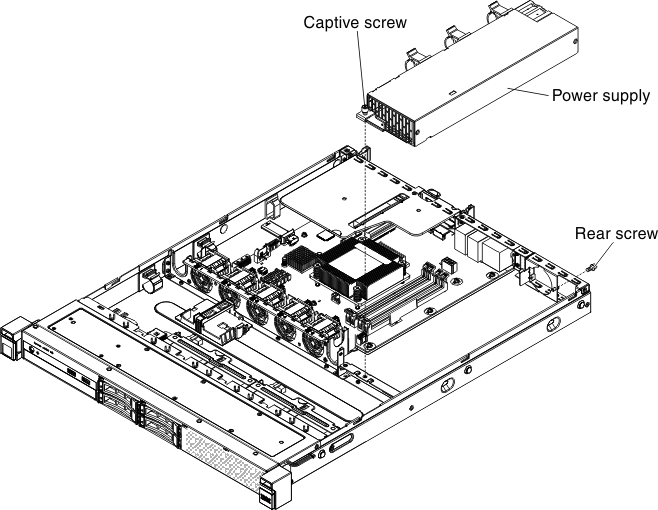
To remove the fixed power supply, complete the following steps.
- Disconnect the power-supply cables from the connectors on the system board and internal devices; then, disengage the cables from any retention-clips.NoteNote the routing of all power-supply cables; you will route the power-supply cables the same way when you install the power supply.Figure 1. Fixed power supply removal
If you are instructed to return the server component or optional device, follow all packaging instructions, and use any packaging materials for shipping that are supplied to you.