
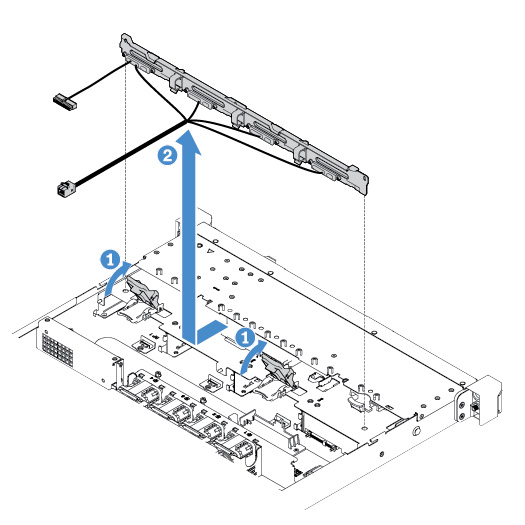
Removing the 3.5-inch simple-swap hard-disk-drive backplate assembly

Note
After you remove the 3.5-inch simple-swap hard-disk-drive backplate assembly, you need to install a new one. See Installing the 3.5-inch simple-swap hard-disk-drive backplate assembly.

To remove the 3.5-inch simple-swap hard-disk-drive backplate assembly, do the following:

  1. Turn off the server. Then, disconnect all external cables and remove all peripheral devices.
  2. Remove the server cover. See Removing the server cover.
  3. Remove the PCI riser-card assembly if installed. See Removing the PCI riser-card assembly.
  4. Disconnect the cables from the RAID adapter or system board. See Internal cable routing. Then, remove the corresponding cables from the cable clips.
  5. Remove the installed hard disk drives or fillers from the drive bays. See Removing a simple-swap hard disk drive.
  6. Pivot the retention latches on the chassis upward. Then, carefully pull the backplate assembly outwards and lift it up to remove it out of the chassis.
    Figure 1. 3.5-inch simple-swap hard-disk-drive backplate assembly removal
    3.5-inch simple-swap hard-disk-drive backplate assembly removal