Replacing a simple-swap hard disk drive
Use this information to replace a simple-swap hard disk drive.
You must turn off the server before installing simple-swap drives in the server. Before you install a simple-swap SAS or SATA hard disk drive, read the following information. For a list of supported hard disk drives, see the Lenovo ServerProven website.
Read the safety information in Safety and Installation guidelines.
If you are replacing a server component in the server, you need to turn off the server and peripheral devices, and disconnect the power cords and all external cables.
To install a simple-swap hard disk drive, complete the following steps:
Note
- If you have only one hard disk drive, install it in the left or upper-left drive bay.
- 3TB hard disk drives are not supported in OS 4690.
- Remove the filler panel from the empty drive bay.
- Touch the static-protective package that contains the drive to any unpainted metal surface on the server; then, remove the drive from the package and place it on a static-protective surface.
- Remove the filler panel from the bay
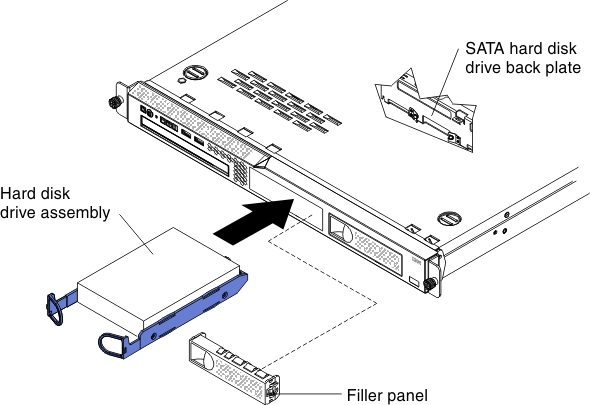
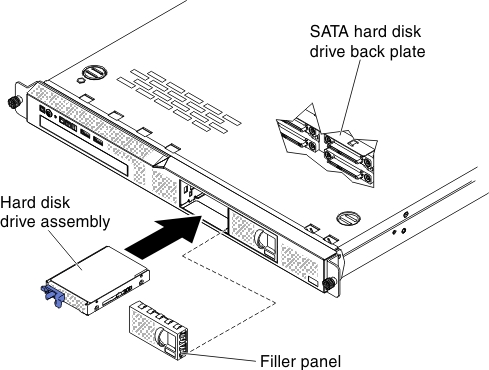
- Install the hard disk drive in the drive bay:
- To install a 3.5-inch simple-swap hard disk drive, pull the loops of the drive tray toward each other, and slide the drive into the server until the drive connects to the backplate. Release the loops of the drive tray.
- To install a 2.5-inch simple-swap hard disk drive, slide the drive into the server until the drive clicks into the server and connects to the backplate.
- To install a 3.5-inch simple-swap hard disk drive, pull the loops of the drive tray toward each other, and slide the drive into the server until the drive connects to the backplate. Release the loops of the drive tray.
- Reinstall the drive bay filler panel that you removed earlier.
- If you are installing additional simple-swap hard disk drives, do so now.
If you have replaced a server component or installed an optional device in the server, you need to reconnect the power cords and all external cables, and turn on the server and peripheral devices.
Give feedback