Replacing the hot-swap hard disk drive backplane
Use this information to replace the hot-swap hard disk drive backplane.
You must turn off the server before installing simple-swap drives in the server. Before you install a simple-swap SAS or SATA hard disk drive, read the following information. For a list of supported hard disk drives, see the Lenovo ServerProven website.
Read the safety information in Safety and Installation guidelines.
If you are replacing a server component in the server, you need to turn off the server and peripheral devices, and disconnect the power cords and all external cables.
To install the hot-swap hard disk drive backplane, complete the following steps:
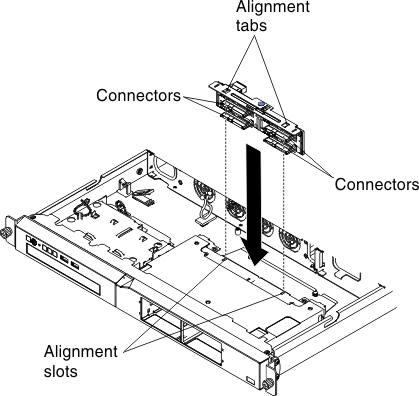
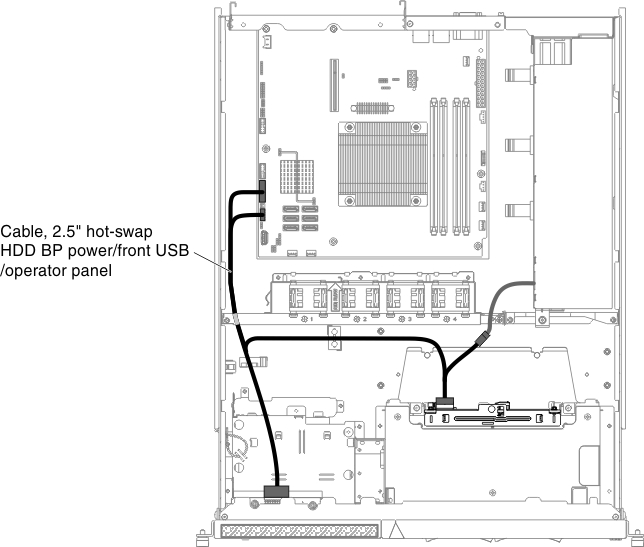
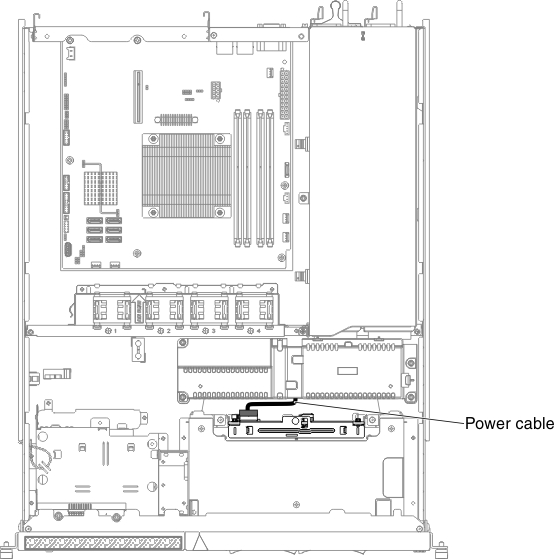
- Press on the blue touch point firmly until the backplane is fully seated and clicks into place. The following illustrations shows the respective cable connections when the hot-swap drive backplane is connected to a redundant power supply or a fixed power supply.NoteMake sure the relevant cables pass through the cable clips.
- Hot-swap backplane connected to fixed power supply:
- Hot-swap backplane connected to redundant power supply:
- Hot-swap backplane connected to fixed power supply:
Give feedback