Install all enclosures into the rack.
CAUTION:
- To lift and install the enclosure into the rack requires at least two people.
- Load the rack from the bottom to ensure rack stability. Empty the rack from the top down.
Following your enclosure location plan, install the correct type of enclosure starting from the bottom.
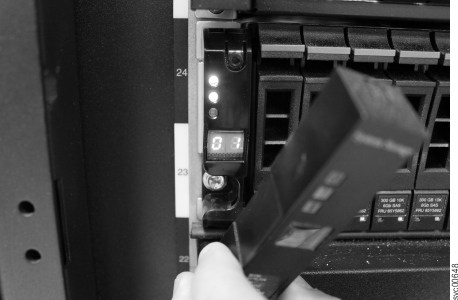
- On either side of the drive assemblies, remove the enclosure end
caps by squeezing the middle of the cap and pulling it away from the
front of the enclosure. Figure 1 shows
how to remove the enclosure end cap. Figure 1. Removing the enclosure end cap
- Align the enclosure with the front of the rack cabinet.
- Carefully slide the enclosure into the rack along the rails until
the enclosure is fully inserted.Notes:
- The preinstalled rails on the sides of the enclosure must fit into the rack-mounted rails that you previously installed.
- The rails are not designed to hold an enclosure that is partially inserted. The enclosure must always be in a fully inserted position.
- Do not have more than one enclosure extended out of the rack at the same time to avoid the danger of the rack toppling over.
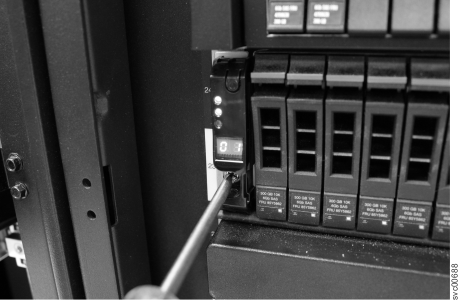
- Insert a screw into the hole behind each enclosure end cap and
tighten the screw. Figure 2. Securing an enclosure to a rack cabinet
- After matching each end cap serial number to the serial number found on the rear of each enclosure, push the end caps back into position.
- Repeat this procedure for each additional enclosure that you install.