You can replace faulty support rails with new ones received
from customer-replaceable unit (CRU) or field-replaceable unit (FRU)
stock.
To replace the support rails, complete the following
steps.
- Identify the enclosure whose rails are to be replaced.
- Shut down the system by following
the steps in Procedure: Powering off your system.
- Remove power from the enclosure by unplugging both power
cables from the electrical outlets.
- Ensuring you identify which port each cable connects to,
remove all cables from the back of the enclosure that has faulty support
rails.
- Remove the
end caps from the front flanges of the enclosure by following the
removal instructions in topic Replacing enclosure end caps.
- Unscrew the M5 screw from the left flange.
Repeat with the M5 screw in the right flange.
- Slide the enclosure from the rack.
CAUTION:
The weight of this part or unit is between
18 and 32 kg (39.7 and 70.5 lb). It takes two persons to safely lift
this part or unit. (C009).
The weight
can be reduced below 18 kg by first labelling and removing each canister,
drive assembly, and power supply unit from the enclosure. If this
is done, ensure all components are labelled such that they can be
replaced in the same slots from which they are removed, and are set
aside safely. Never apply physical shock to a drive assembly as this
can damage the drive or the data on it.
- Locate the left support rail.
Record the shelf number of the support rail so that the replacement
rails can be installed into the same position.
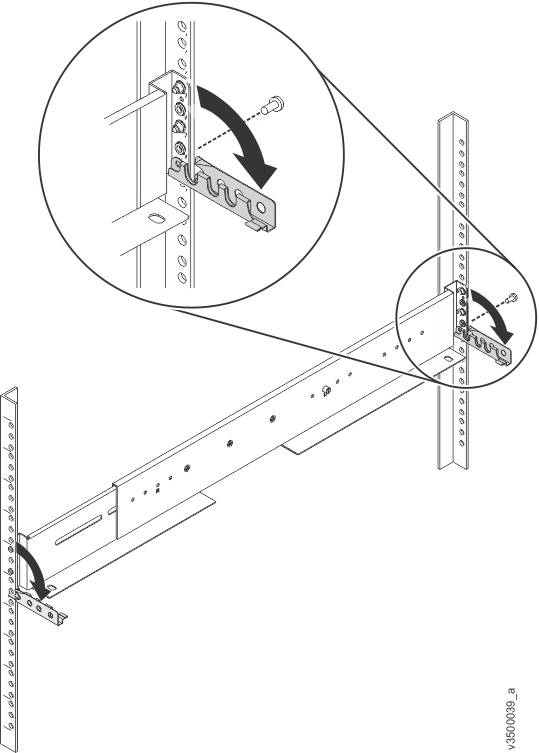
- At the rear of the rack, remove the
securing M5 screw from the bottom hole of the rear bracket of the
rail, then open the rear hinge bracket (Figure 1).
Figure 1. Opening rear hinge bracket of mounting rail
- At the front of the rack, hold onto the rail and open the
front hinge bracket.
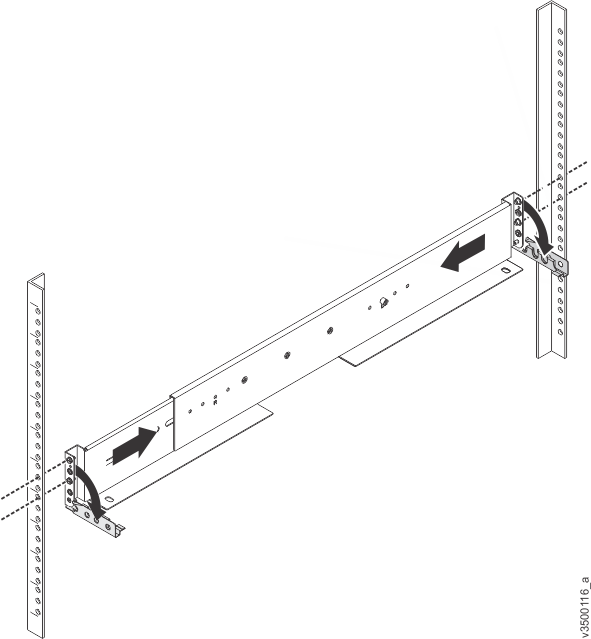
- Compress the rail against its spring
to shorten it, then remove it from the inside the rack (Figure 2).
Figure 2. Compressing rail for removal from rack
- Repeat steps 9 to 11 on the right
support rail.
- Install the new support rails at the rack position recorded
at step 8 by
following the instructions in Installing the support rails.
- Reinstall the enclosure (removed at step 7) and the end caps (removed at step 5)
by following the instructions in Installing the enclosures.
- If components were removed from
the enclosure at step 7,
return each canister, drive assembly, and power supply unit to its
labelled slot.
- Reconnect the cables, ensuring that they are connected
to their original ports.
- Reconnect the power supply cables to their original power
supply and electrical outlet.
- After the system is online, use the management GUI to verify that the system is correct.