Installing support rails for the system

Before you install a control or expansion enclosure, you must first install the support rails. The same rails for are used for control and expansion enclosures.

Note: For NEBS compliant installations, more requirements are placed on the rack into which the support rails and enclosures are to be installed. Before you proceed, ensure that the rack meets the requirements that are listed in NEBS-compliant earth connection.

To install the support rails for an enclosure, complete the following steps.

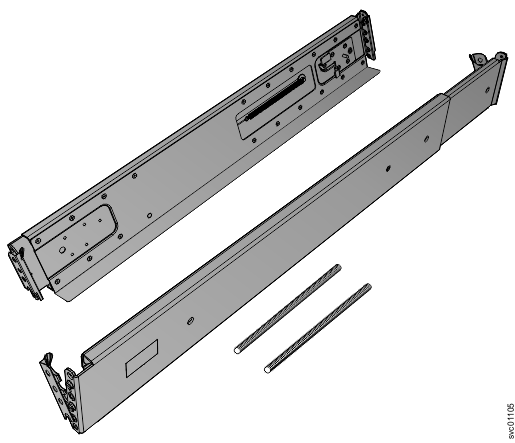
  1. Locate the enclosure rails (Enclosure support rails).
    The rail assembly consists of two rails that must be installed in the rack cabinet.
    Figure 1. Enclosure support rails
    Image of control enclosure support rails

  2. Install a spring on the rail rail.
    1. Push one looped end of a spring over one stud on the inside of the rail. (See Installing the rail spring.)
    2. Stretch the spring slightly and push the other looped end of the spring onto the other stud on the inside of the rail.
    Figure 2. Installing the rail spring
    Image of rail springs in a support rail

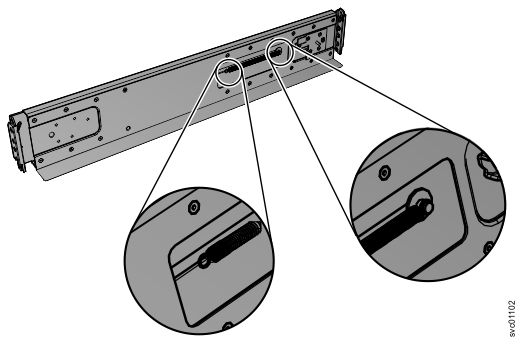
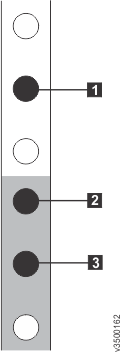
  3. Working at the front of the rack cabinet, identify the two standard rack units (2U) of space in the rack into which you want to install the support rails.
    Hole locations in the front of the rack shows two rack units with the front mounting holes identified.
    Figure 3. Hole locations in the front of the rack
    This figure shows the hole locations in the front of the rack when you install the rails.

    • 1 Upper rail-mounting bracket pin
    • 2 Lower rail-mounting bracket pin
    • 3 Rack mounting screw hole
  4. Ensure that the appropriate bracket pins are installed in the front and rear bracket of each rail.
    Each rail comes with four medium pins preinstalled (two in the front bracket and two in the rear bracket). Large and small pins are provided separately. Use the pins that are appropriate for the mounting holes in your rack (see Selecting bracket pins for your rack).
    Table 1. Selecting bracket pins for your rack.

    Mounting holes Bracket pins
    Round, unthreaded Use the preinstalled medium pins.
    Round, threaded Unscrew the medium pins and replace with the smaller pins supplied with the rails.
    Square Unscrew the medium pins and replace with the large pins supplied with the rails.
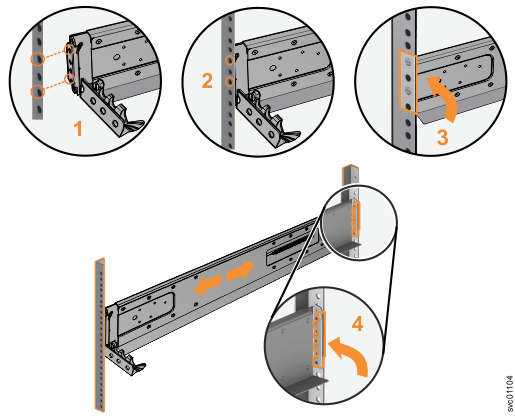
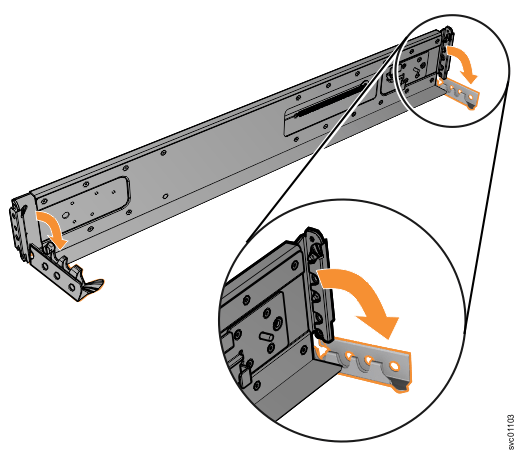
  5. At each end of the rail, grasp the tab and pull firmly to open the hinge bracket.
    (See Opening the hinge brackets.)
    Figure 4. Opening the hinge brackets
    Image of rail spring

  6. Align the holes in the rail bracket with the holes on the front and rear rack cabinet flanges.
    Ensure that the rails are aligned on the inside of the rack cabinet.
  7. On the rear of the rail, press the two bracket pins into the holes in the rack flanges.
  8. Close the rear hinge bracket to secure the rail to the rack cabinet flange.
    (See Closing the hinge brackets.)
    Figure 5. Closing the hinge brackets
    Image showing how to close hinge brackets

  9. On the front of the rail, press the two bracket pins into the holes in the rack flanges.
  10. Close the front hinge bracket to secure the rail to the rack cabinet flange.
    Closing the hinge brackets shows an example.
  11. Repeat step #tb5_qi_installing_rails/spring through step #tb5_qi_installing_rails/close_bracket to secure the opposite rail to the rack cabinet.
  12. Repeat the procedure to install rails for each additional control enclosure.