Use this information to install a simple-swap hard disk drive.
You must turn off the server before installing simple-swap drives in the server. Before you install a simple-swap SATA hard disk drive, read the following information. For a list of supported hard disk drives, see the Lenovo ServerProven website.
- Locate the documentation that comes with the hard disk drive and follow those instructions in addition to the instructions in this chapter.
- As a general consideration, do not mix standard 512-byte and advanced 4-KB format drives in the same RAID array because it may lead to potential performance issues.
- Make sure that you have all the cables and other equipment that are specified in the documentation that comes with the drive.
- Select the bay in which you want to install the drive.
- Check the instructions that come with the drive to determine whether you have to set any switches or jumpers on the drive. If you are installing a SATA device, be sure to set the SATA ID for that device.
- The simple-swap server models support up to sixteen 2.5-inch or eight 3.5-inch simple-swap SATA hard disk drives. Do not install hot-swap drives into a simple-swap server model, it is not supported.
- You can install one 2.5-inch simple-swap SATA hard disk drives in bay 0 in the server. Do not install hot-swap drives into a simple-swap server model, it is not supported.
- The simple-swap server models are available only in non-RAID configurations.
- The electromagnetic interference (EMI) integrity and cooling of the server are protected by having all bays and PCI Express slots covered or occupied. When you install a drive or a PCI Express adapter, save the EMC shield and filler panel from the bay or PCI Express adapter slot cover in the event that you later remove the device.
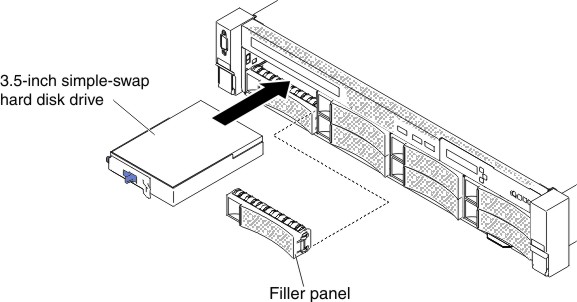
To install a simple-swap hard disk drive, complete the following steps:
- Install the hard disk drive in the drive bay. Align the
drive assembly with the guide rails in the bay and gently push the
drive into the bay until the drive stops.
Figure 1. 2.5-inch simple-swap hard disk drive installation
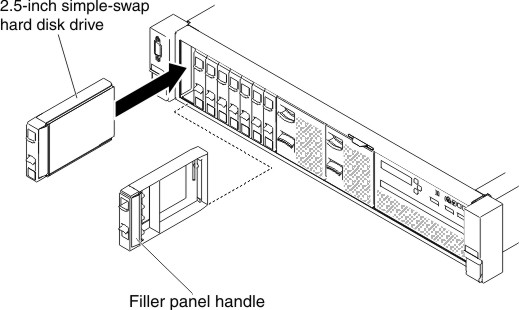
Figure 2. 3.5-inch simple-swap hard disk drive installation