Use this information to replace a riser-card assembly.
The server provides two riser-card slots on the system board. The following information indicates the riser-card slots:
- PCI riser slot 1 (the farthest slot from the power supplies). You must install a riser-card assembly in slot 1 with microprocessor 1.
- PCI riser slot 2 (the closest slot to the power supplies). You must install a riser-card assembly in slot 2 with microprocessor 2.
- PCI riser-card brackets must be installed even if you do not install an adapter.
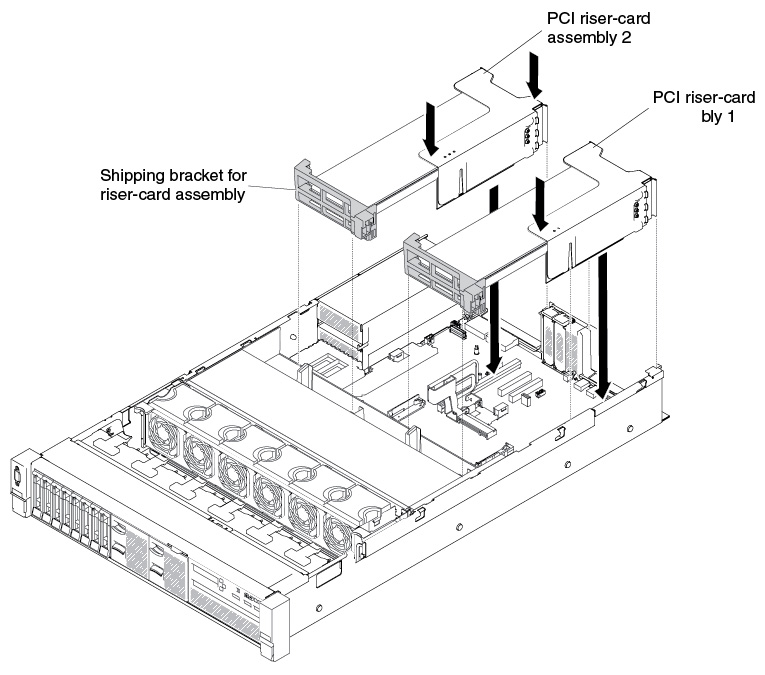
To install a riser-card assembly, complete the following steps:
- Align the riser-card assembly with the selected PCI connector
on the system board and align it with the slots on the chassis; then,
lower it into the server and press down firmly until the riser-card
assembly is seated correctly in the connector on the system board.
- For half-length and low profile adaptersFigure 1. Riser-card assembly installation - half-length and low profile adapters

- For full-height, full-length adaptersNote: Shipping brackets are only included in the server that is pre-configured with full-height, full-length adaptersFigure 2. Riser-card assembly installation - full-height, full-length adapters
- For half-length and low profile adapters