Use this information to replace a hot-swap ac power supply.
The following notes describe the type of power supply
that the server supports and other information that you must consider
when you install a power supply:
- Before you install an additional power supply or replace a power supply with one of a different wattage, you may use the Power Configurator utility to determine current system power consumption. For more information and to download the utility, go to the IBM Power Configurator website.
- The server comes with one hot-swap 12-volt output power supply that connects to power supply bay 1. The input voltage is 100-127 V ac or 200-240 V ac auto-sensing for AC power supplied and is -48V dc or -60V dc auto-sensing for DC power supplies.
- Power supplies in the server must be with the same power rating or wattage, and the same 80-plus efficiency level to ensure that the server will operate correctly. For example, you cannot mix 550-watt and 750-watt power supplies in the server. Moreover, you cannot mix 750-watt Platinum and 750-watt Titanium supplies in the server.
- Power supply 1 is the default/primary power supply. If power supply 1 fails, you must replace the power supply with the same wattage and the same 80-plus efficiency level immediately.
- You can order an optional power supply for redundancy.
- These power supplies are designed for parallel operation. In the event of a power-supply failure, the redundant power supply continues to power the system. The server supports a maximum of two power supplies.
Statement 5


CAUTION:
The power control button on the
device and the power switch on the power supply do not turn off the
electrical current supplied to the device. The device also might
have more than one power cord. To remove all electrical current from
the device, ensure that all power cords are disconnected from the
power source.
Statement 8
CAUTION:
Never remove the cover on a power supply or any part
that has the following label attached.

Hazardous voltage, current, and energy levels are present inside any component that has this label attached. There are no serviceable parts inside these components. If you suspect a problem with one of these parts, contact a service technician.
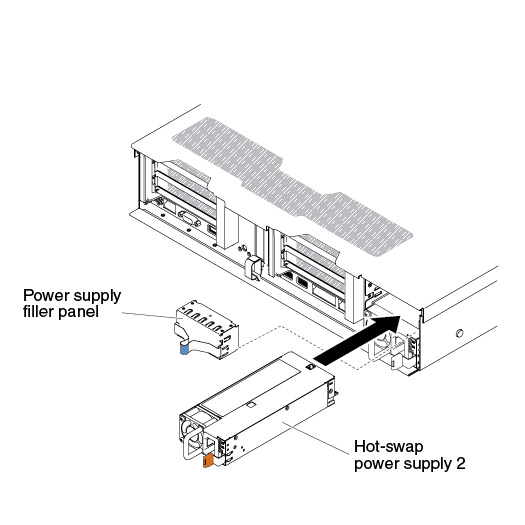
To install a power supply, complete the following steps:
- If you are installing a hot-swap power supply into an empty
bay, remove the power-supply filler from the power-supply bay.
Figure 1. Power supply installation
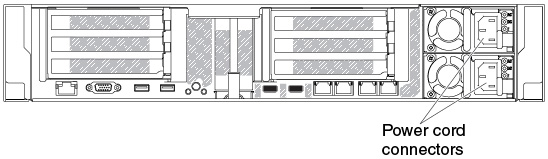
- Connect the power cord for the new power supply to the
power-cord connector on the power supply. The following illustration
shows the power-cord connectors on the back of the server.
- If you are replacing a power supply to the server, attach
the redundant power information label that comes with this option
on the server cover near the power supplies.
Figure 2. Attaching the redundant power information label
